Preferences
Preferences enable your users to opt-out of the notifications you send using Knock.
How preferences work
A user has a PreferenceSet. A PreferenceSet is a JSON object that tells Knock which channels, categories, and/or workflows a user has opted out of receiving.
When Knock runs a workflow for a user, we evaluate their PreferenceSet. A message will not send if the user has opted out of receiving it.
A preference set is built using three keys: categories, channel_types, workflows. These keys resolve to boolean values to determine if a user has opted out of receiving a notification.
A few examples:
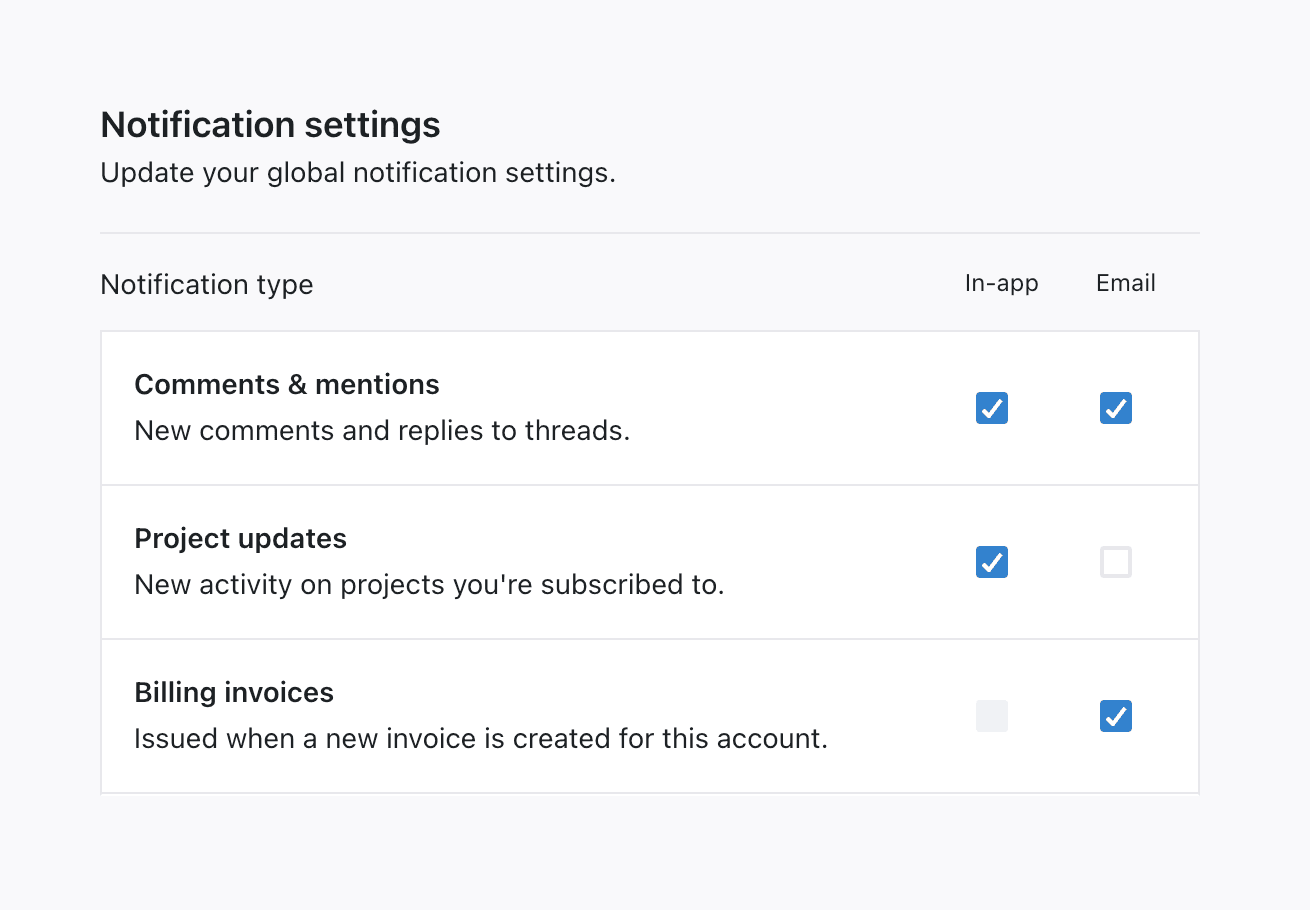
You can combine these keys to create preference grids (example):
The PreferenceSet above models this preference grid in your application:
Build your preference center
Before you start setting preferences for your users, you need to build a preference center in your application. A preference center is a place where users can manage their notification preferences.
You can see live example of a preference center in our in-app demo playground.
There are two steps to building a preference center with Knock:
Create a default PreferenceSet
A default preference set is the PreferenceSet users default to using when they first sign up for your product. Any users who don't have a preference set will default to using the default preference set. You can create a default preference set in the Knock dashboard under Developers > Preferences.
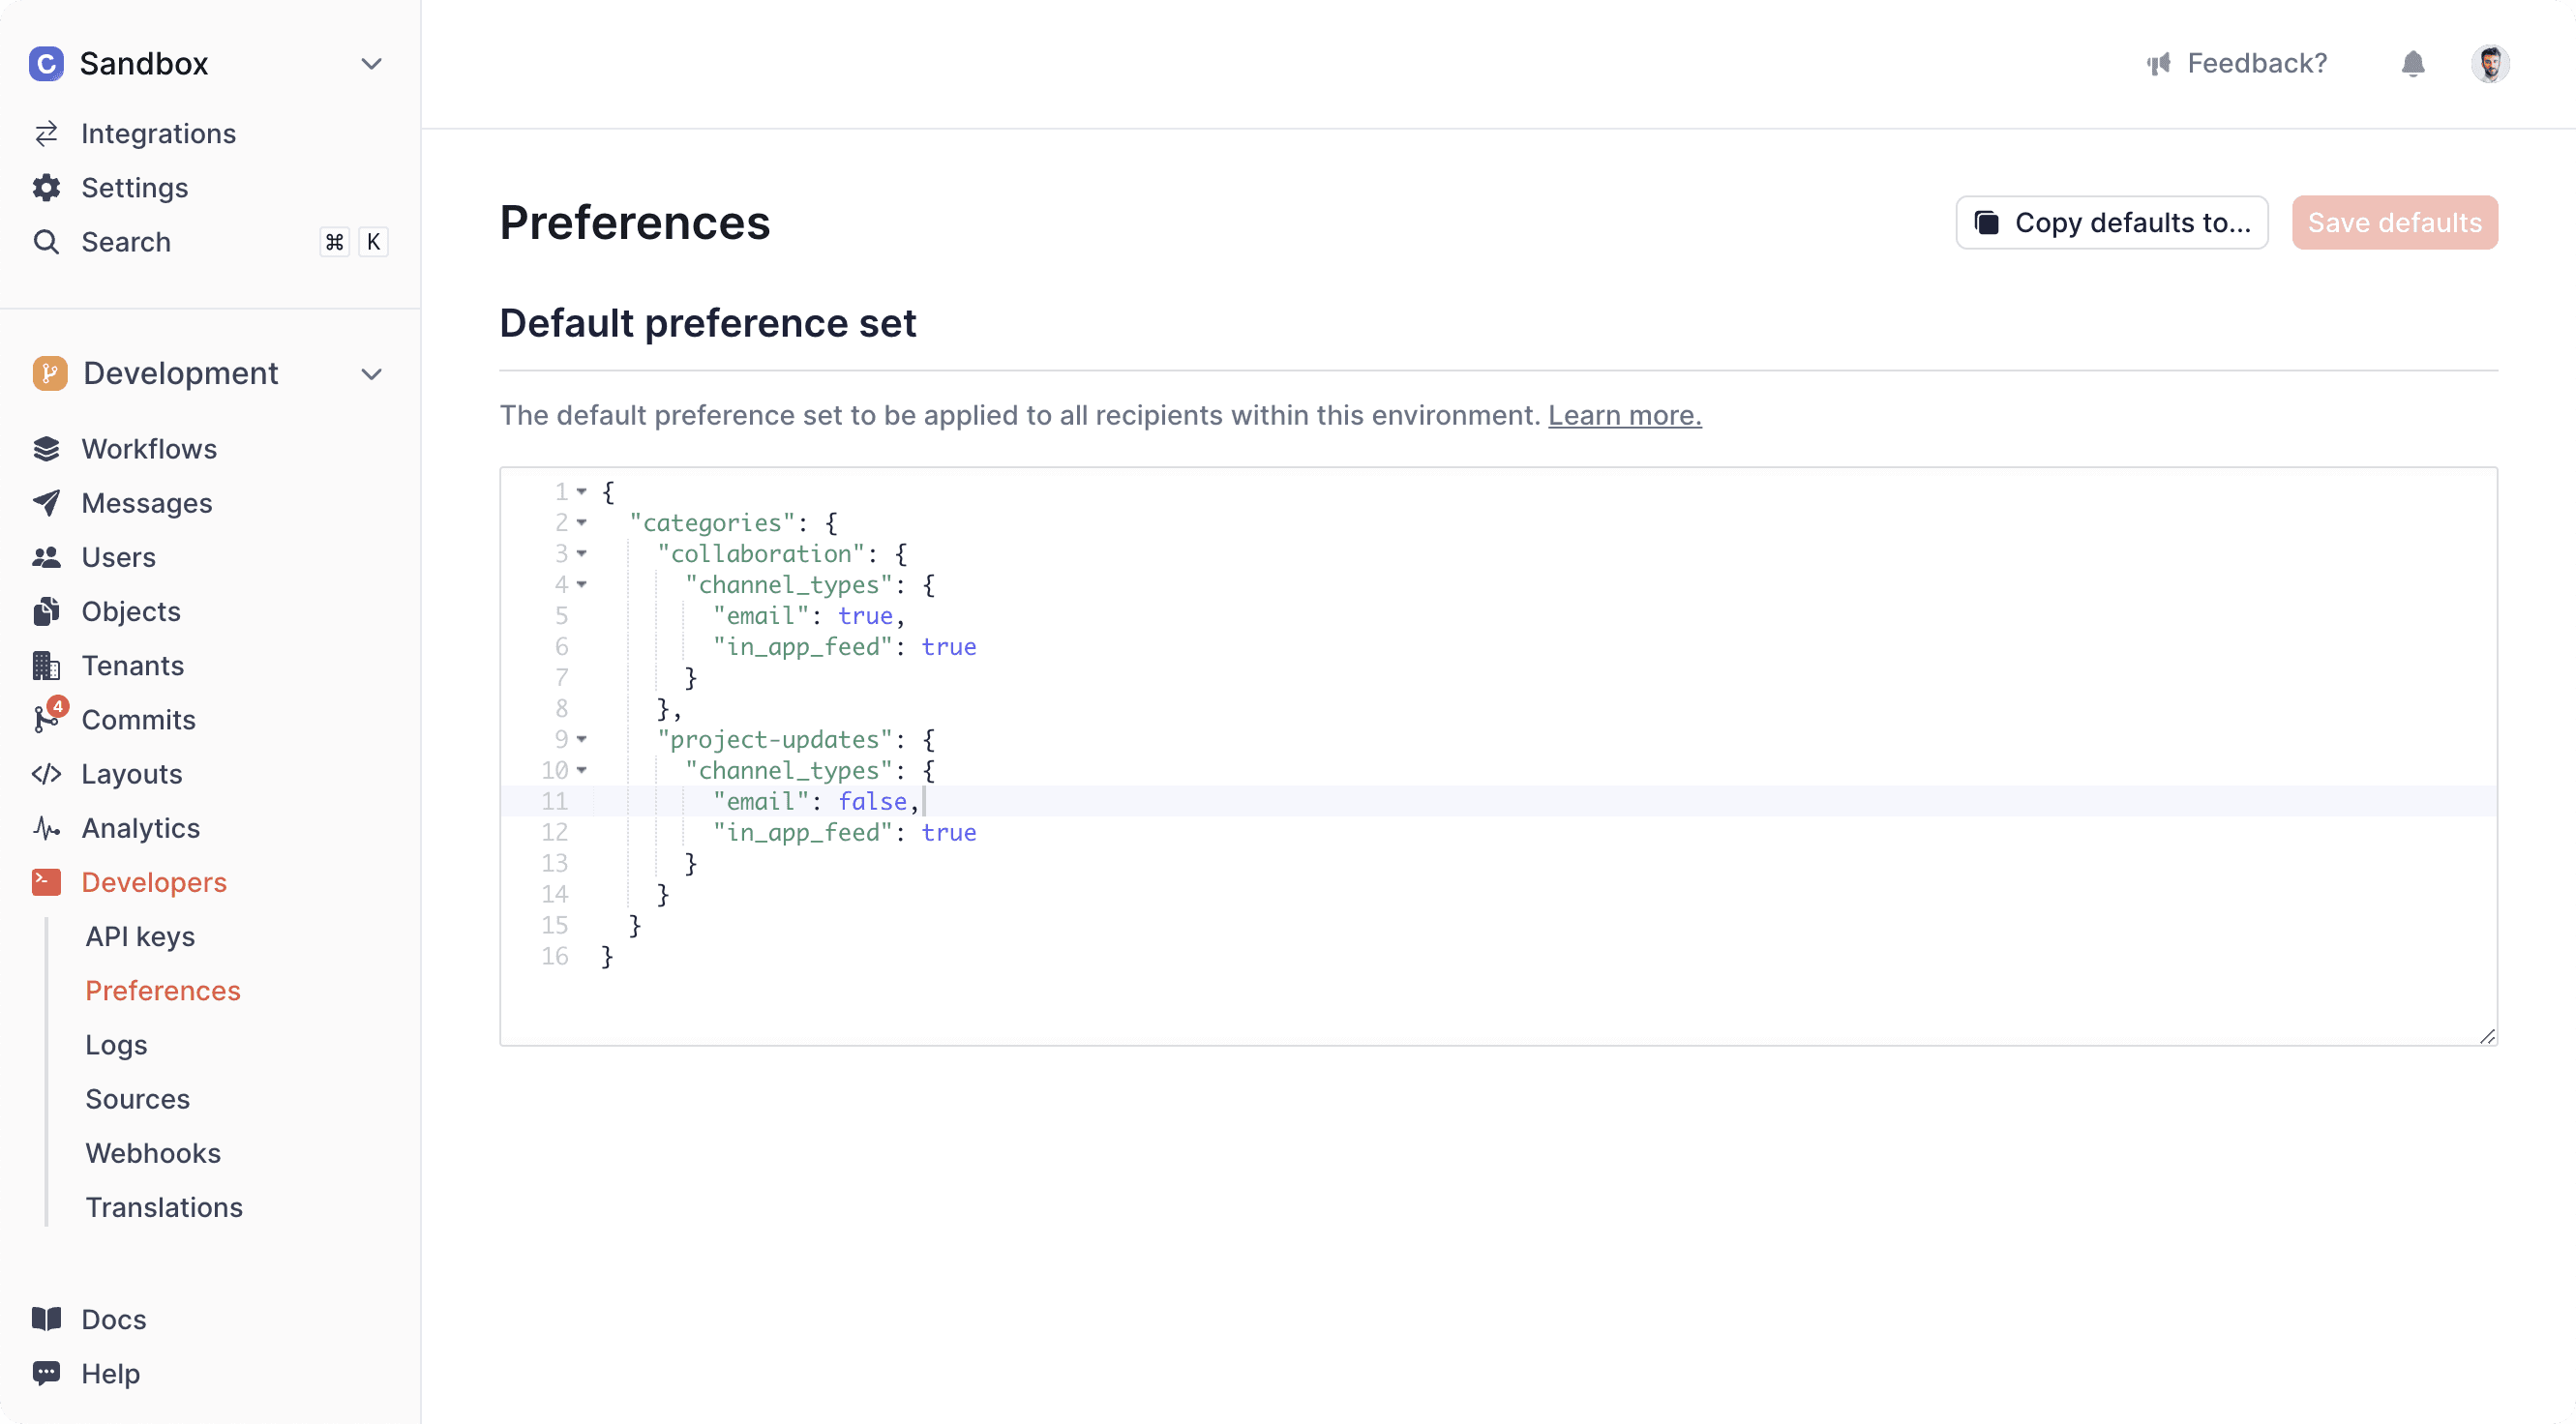
The default preference set is environment-specific for testing purposes. You can copy the default preference set from one environment to another to keep your environments in sync.
Render your preference center
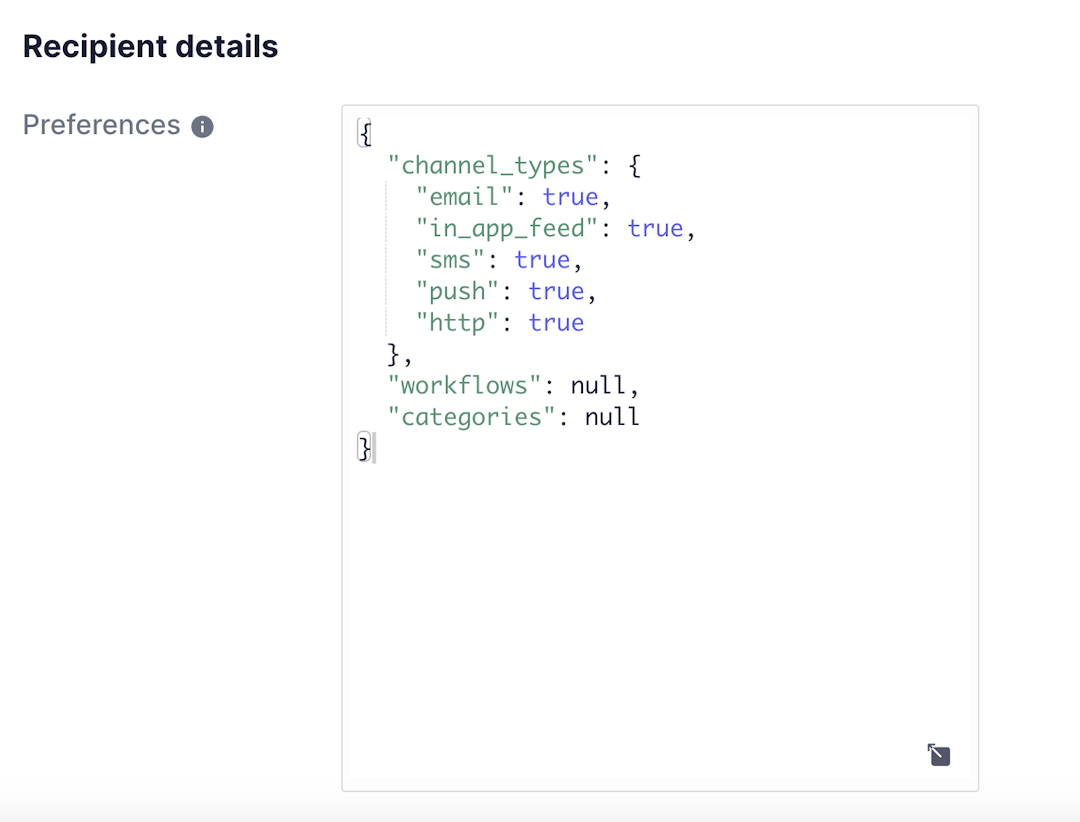
Once you have your default PreferenceSet created, you'll need to render it to users in your application so they can change their notification preferences.
You can use the getPreferences method to retrieve a user's preferences and render them in your application. If no preferences are set, this method will return the default preference set you created in the step above.
You can learn more about rendering preferences to users in your application in the Building In-app UI section of our documentation.
Quick links:
Set a user's preferences
Once you've built your preferences center, you'll need to handle setting a user's preferences in your application.
Bulk set user preferences
You can update the preferences of up to 1000 users in a single batch by using the users.bulkSetPreferences method. This executes an asynchronous job which will overwrite any existing preferences for the users provided. You can track the progress of the BulkOperation returned via the bulk operation API.
Preference evaluation rules
When a workflow is triggered, Knock will evaluate the preferences for each recipient of the workflow and send notifications for each channel step in the workflow based on that evaluation. There are some important rules and caveats to consider:
Advanced concepts
- Per-tenant preferences. In multi-tenant B2B applications, an advanced use case is customer admins who want to set the tenant-level default
PreferenceSetfor new users within their tenant. - Object preferences. In the guide above, we referred to user preferences. You can also set preferences for objects.
- Preference conditions. You can build advanced conditions and store them on Knock’s preference model to power use cases such as per-resource muting (example: mute notifications about this task) or threshold alerts (example: only notify me if my account balance is below $5).
- Workflow overrides. If you need to override a recipient's notification preferences to send notifications like a password reset email, you can override the preferences model. To do this, go to your workflow, click "Manage workflow," and enable "Override recipient preferences." You will need to commit this change for it to take effect. When enabled, the workflow will send to all of its channels, regardless of the recipient's preferences.