Get started with Knock
Quickly get up and running with Knock and React.
This page covers how to integrate Knock's NotificationFeed component in a React application and send your first notification using Knock's test runner.
Create a Knock account
First, create a Knock account if you don't already have one and log into the Knock dashboard.
Create a new React application
Run the following command to create a new React application.
Follow the CLI prompts and use all of the default selections, then run the following command to change into your project directory:
Install Knock dependencies
Install the following dependencies so you can use the Knock NotificationFeed component in your app and trigger workflows from server actions.
Set your environment variables
Run the following command to generate a new env.local file and add the following environment variables to authenticate your requests to Knock:
You can find your public and secret API keys under the Platform section of the Knock dashboard.
You can find the id of your Knock in-app feed channel in Settings > Integrations > Channels.
Add Knock components to your app
You'll need to create a component to render the default Knock components. Run the following command to create a new component file called inbox.tsx inside of the app:
Since this file uses client-side React APIs, it will need to be a client component. You can add the following code to the empty inbox.tsx file:
In production, you will want to colocate KnockProvider and KnockFeedProvider at a higher level in your application.
If you pass a user that doesn't exist, Knock will automatically create one with the specified id using client-side inline identification.
Render the `Inbox` component
Next, replace the contents of /src/App.tsx with the code below to import the Inbox component and render it in your App component.
Next, run your development server to render the Inbox component in a browser. There will be no messages, but you should be able to switch between tabs.
Create a workflow in Knock
Next we'll design our first workflow in Knock via the dashboard.
A workflow encapsulates a notification in Knock. Each workflow takes a trigger call via the Knock API, runs the data you provide through a set of logic you configure, and outputs the actual messages that will be sent to your end users. All channel routing and message design takes place within the workflow.
Here's how to build your first workflow:
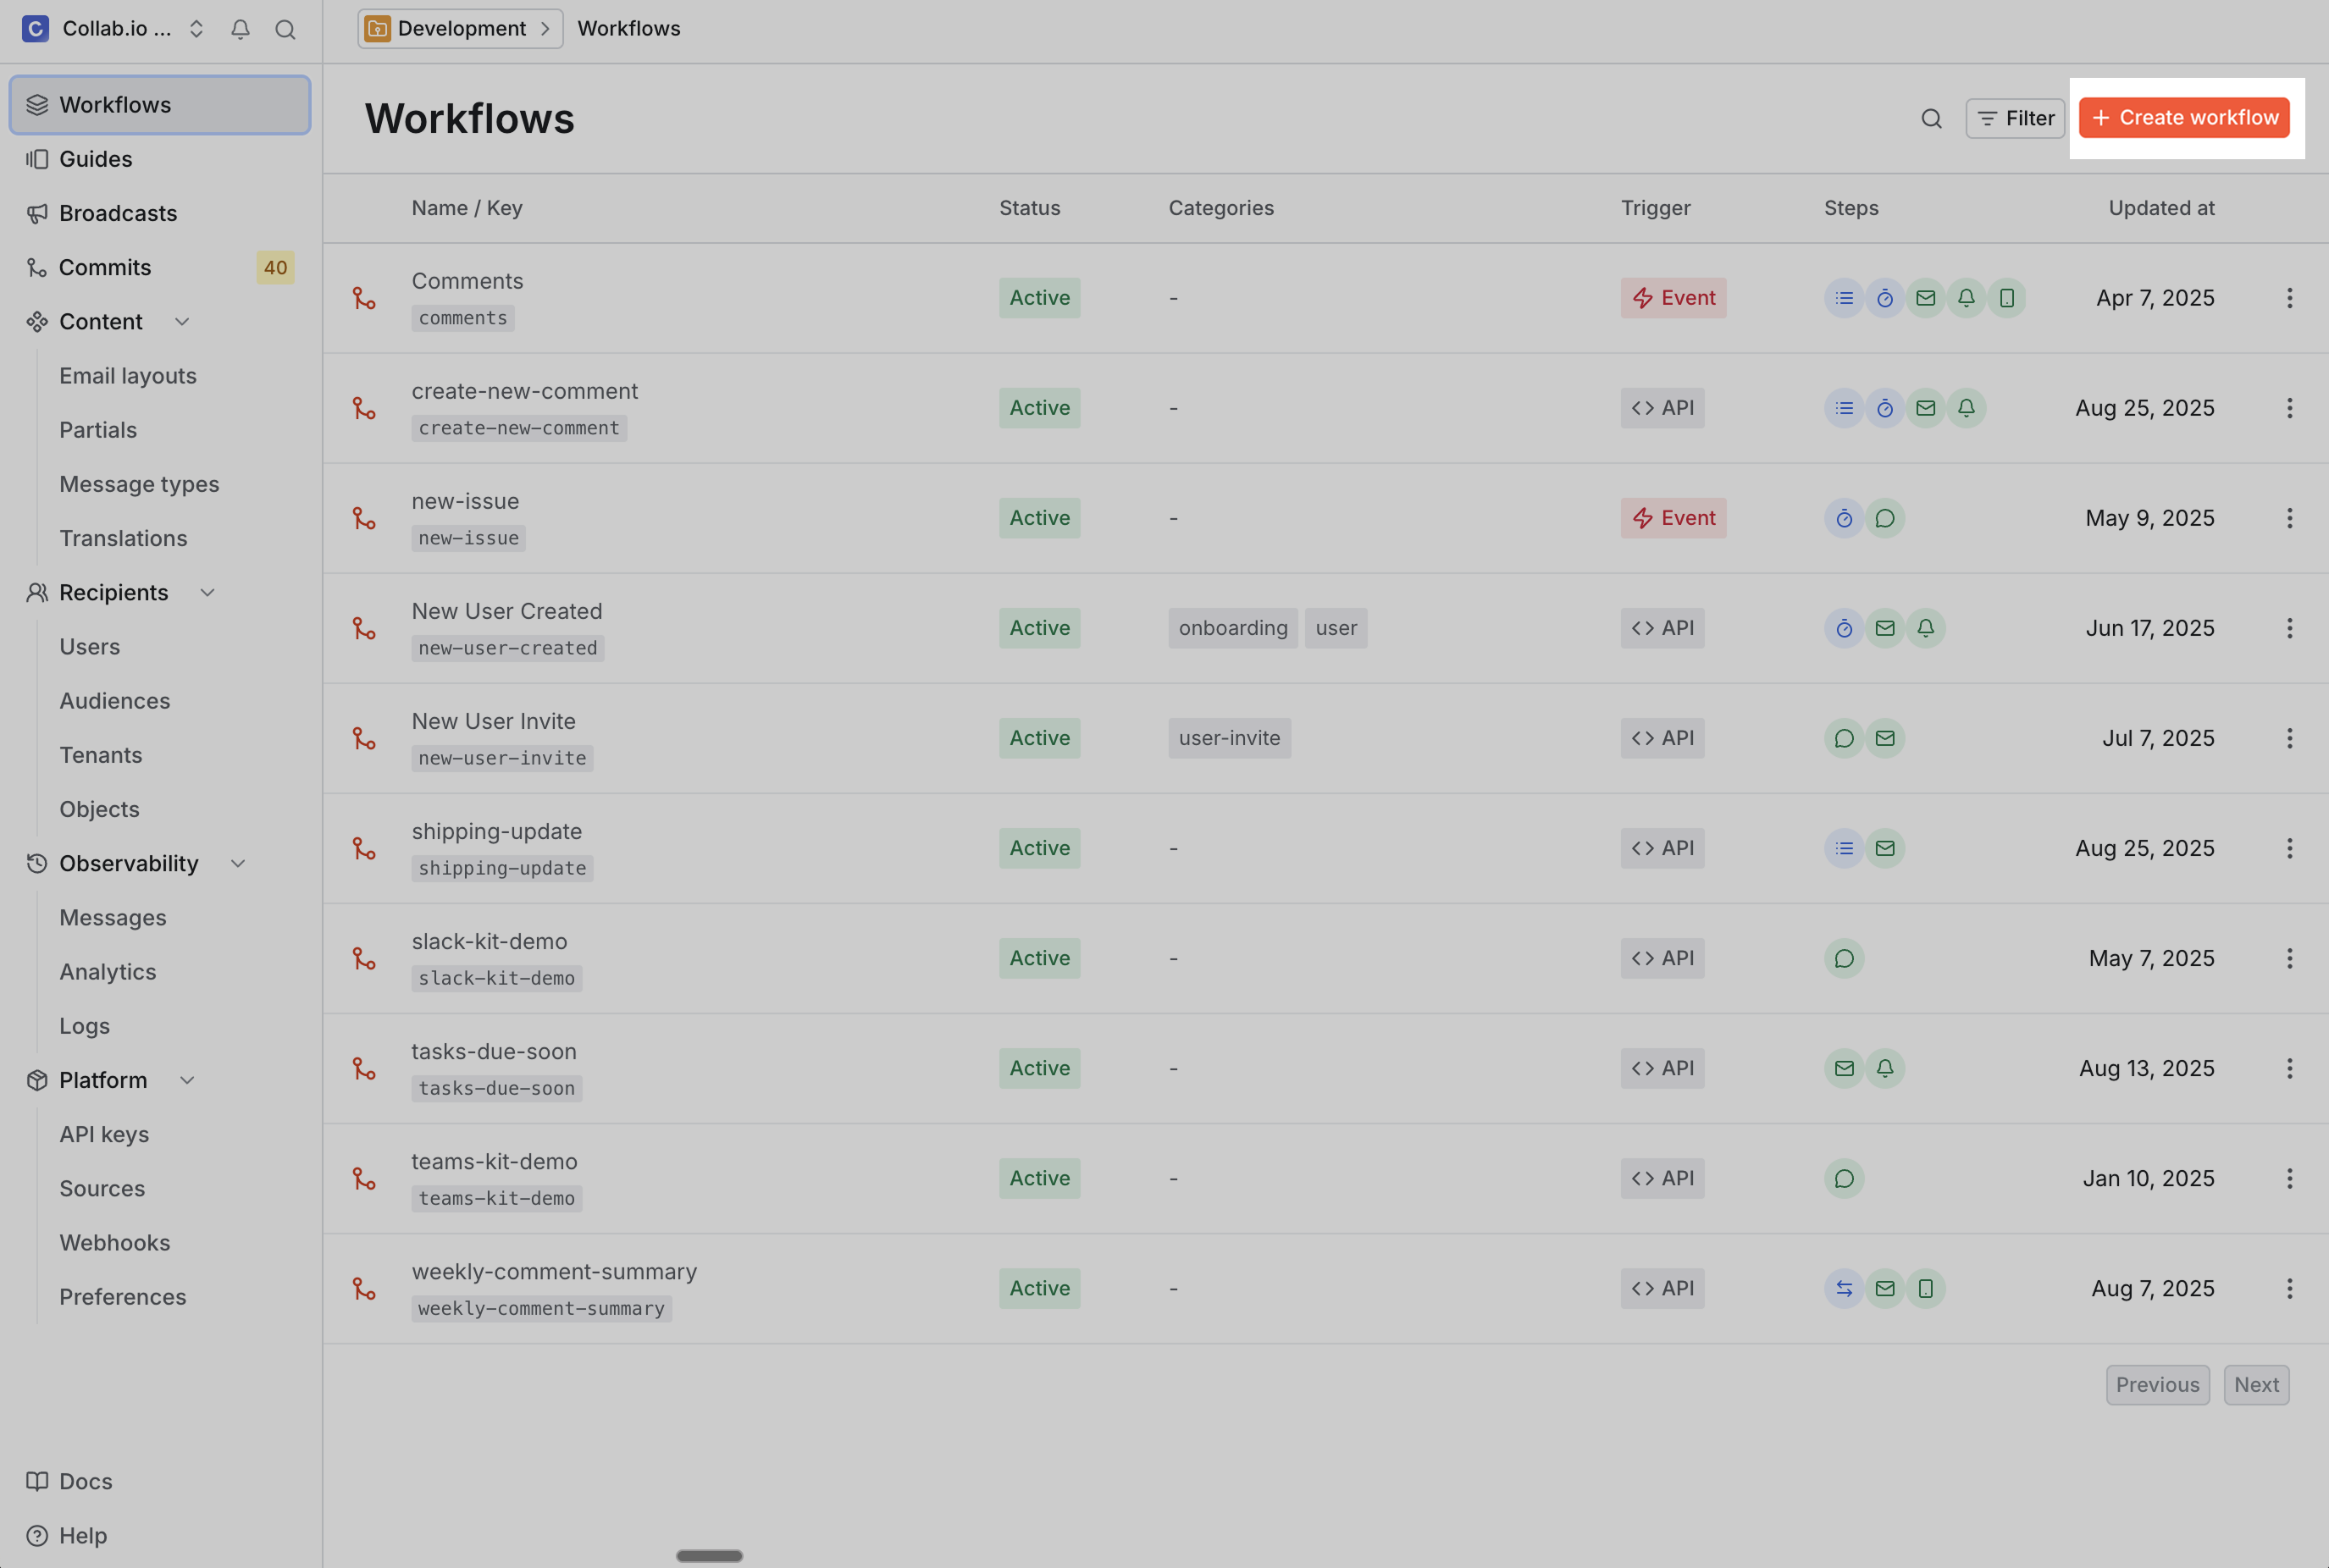
Navigate to the Workflows section of the Knock dashboard. Click the "+ Workflow" button in the top right corner of the Knock dashboard. Name it knock-quickstart to test your integration.
To send a notification, a workflow needs at least one channel step. To add this step, we'll click “edit steps” to enter the workflow canvas editor.
Here we can see a number of steps available for us to add to our workflow, including functions (such as batch and delay) and channels.
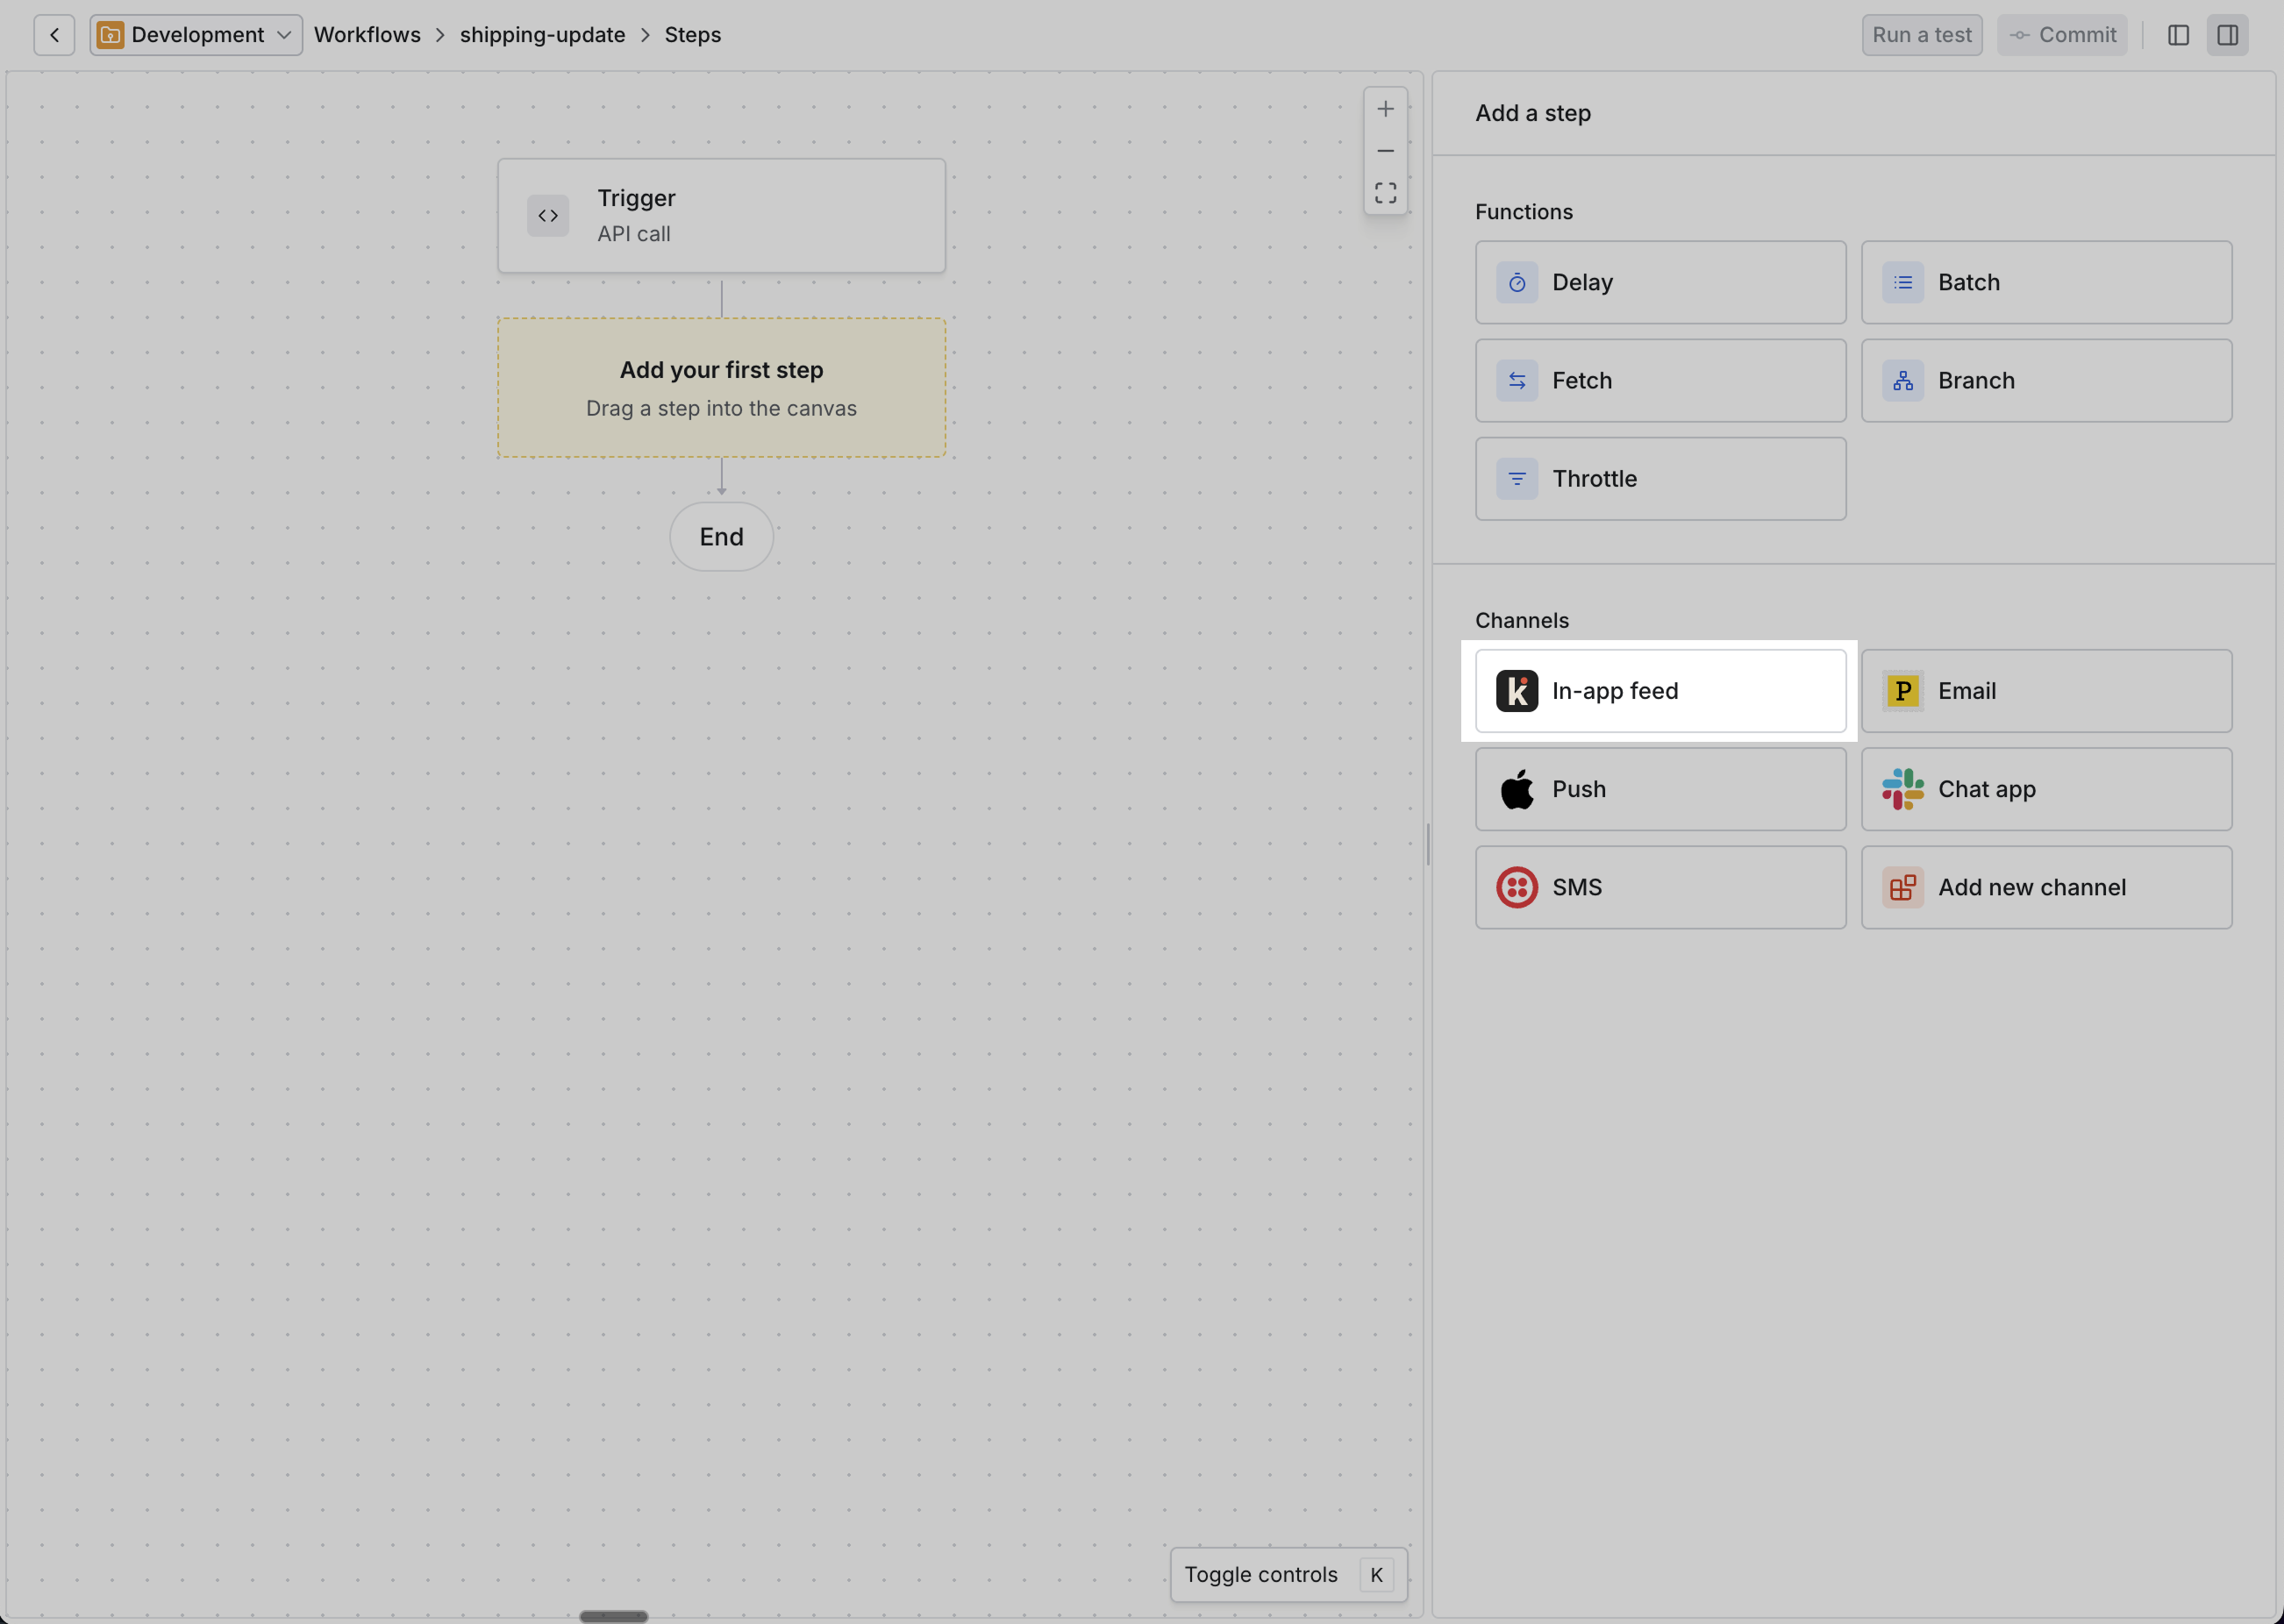
Drag the 'In-app feed' step onto the workflow canvas.
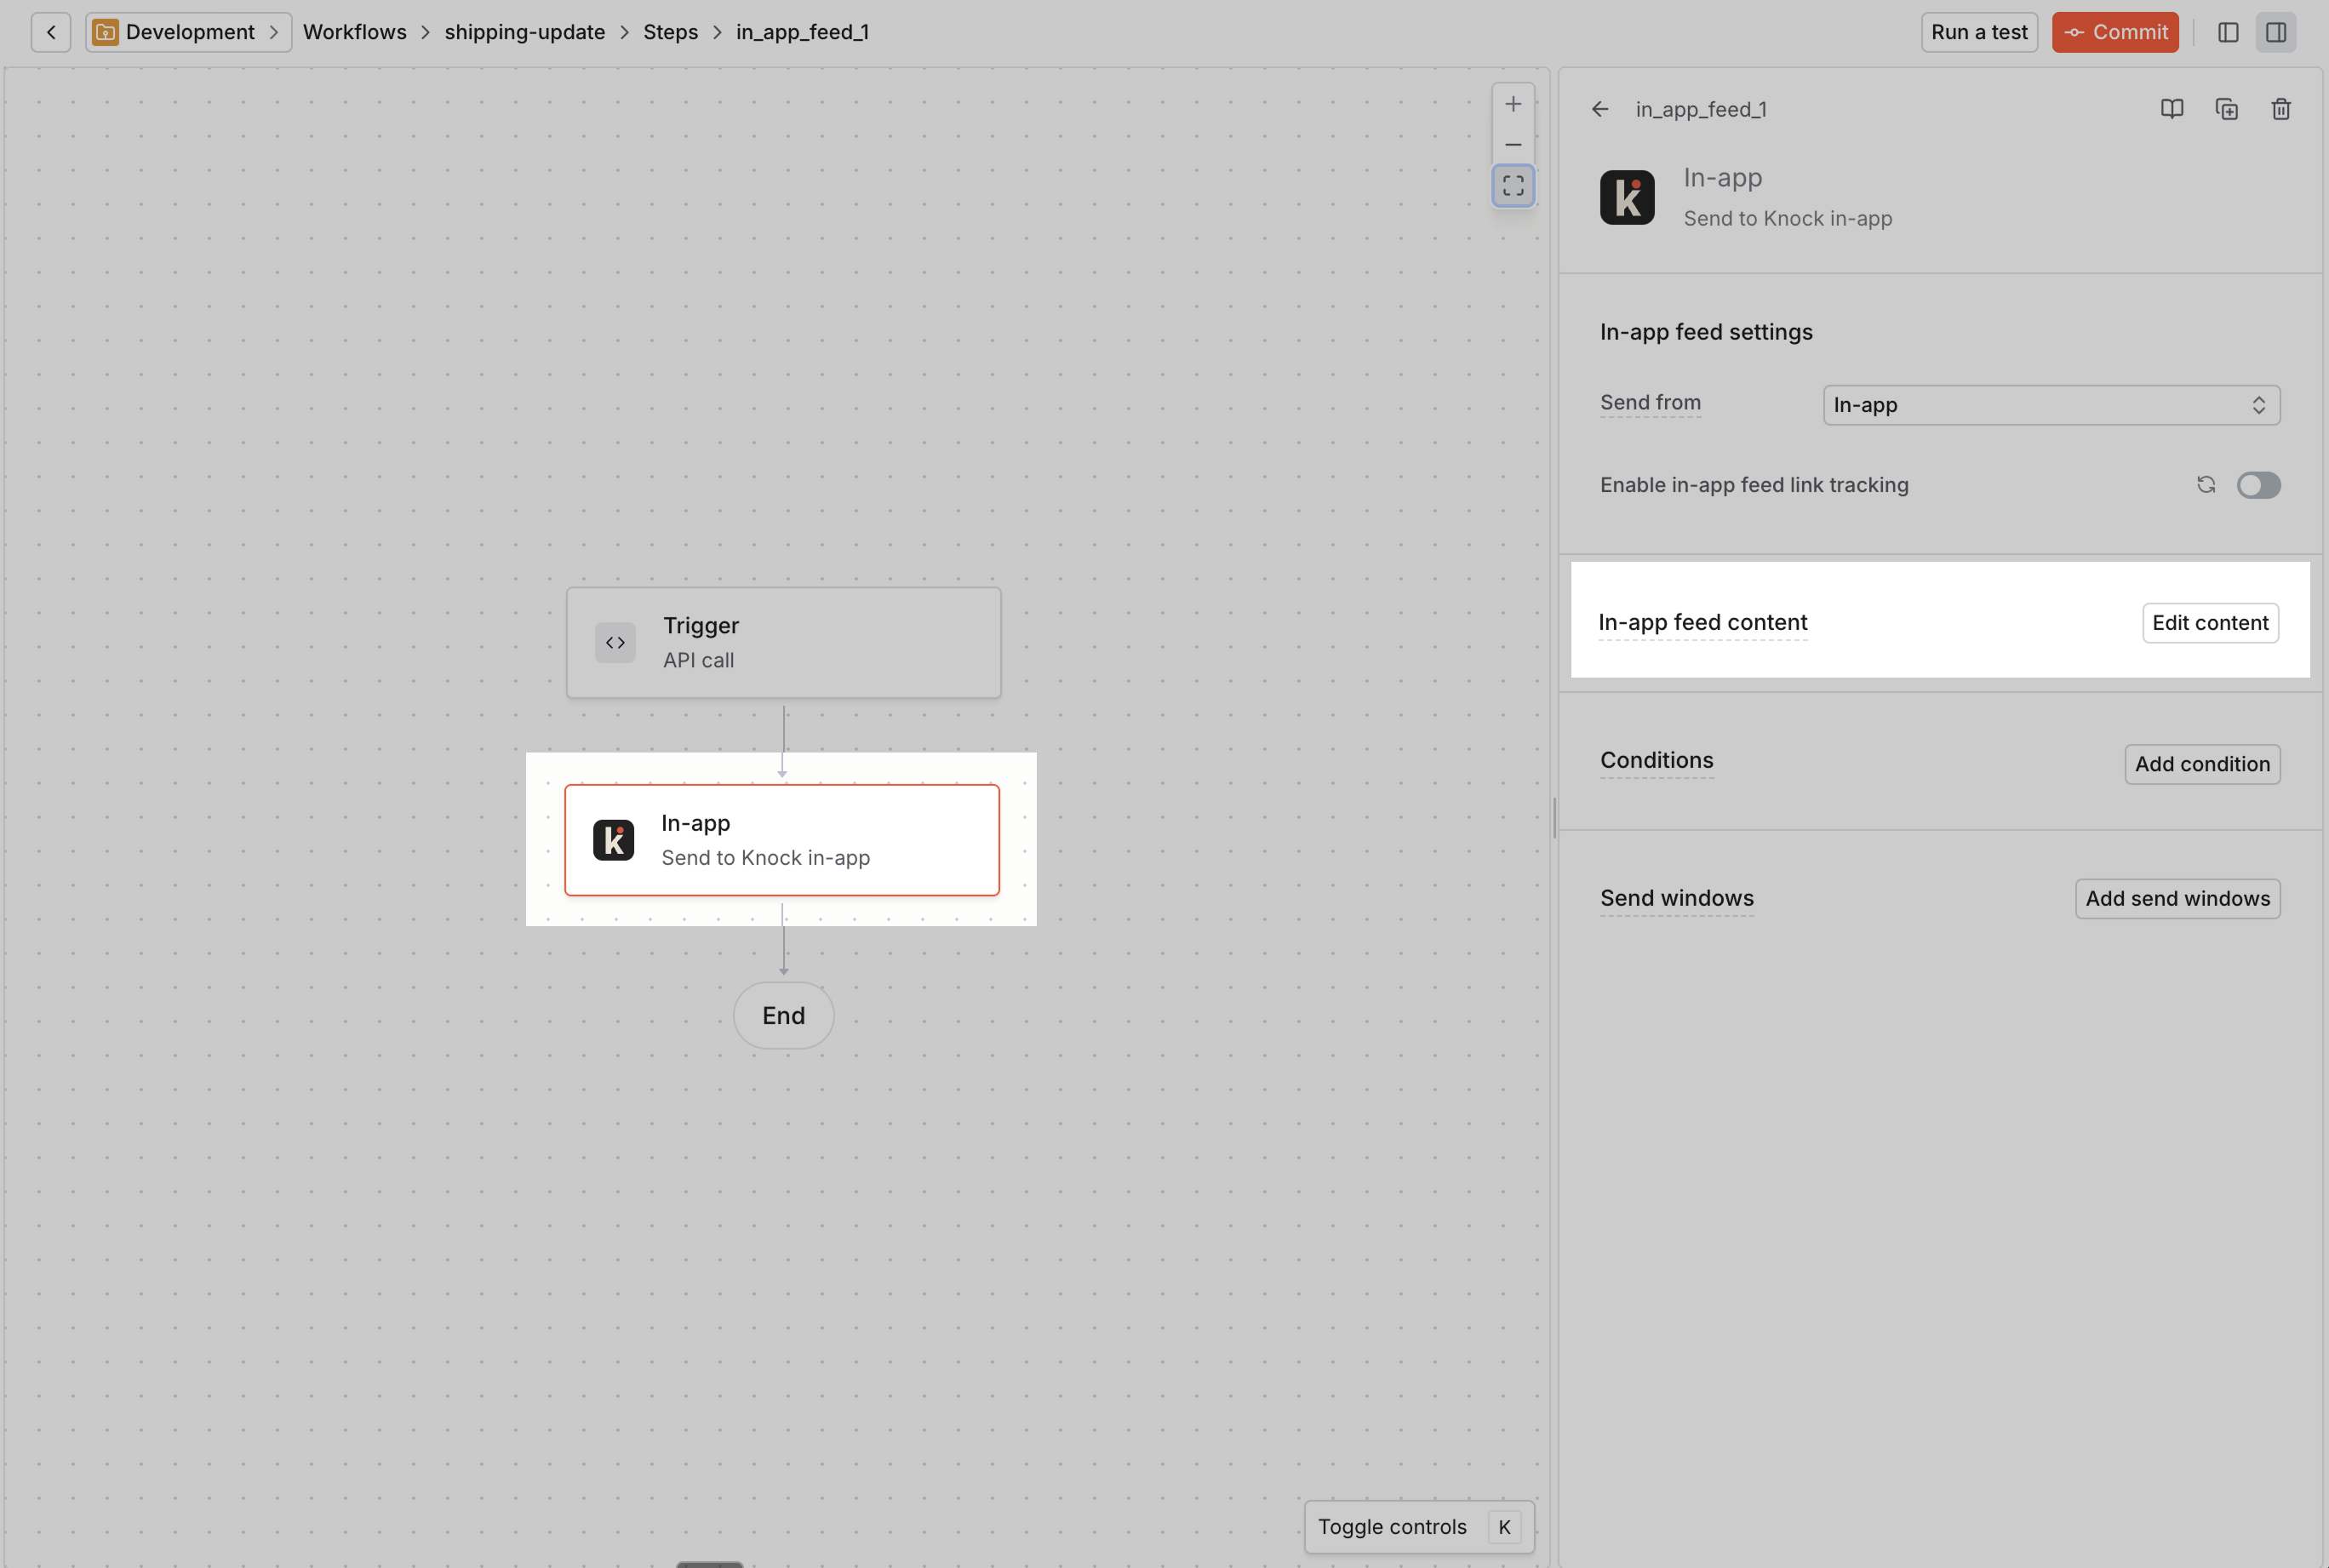
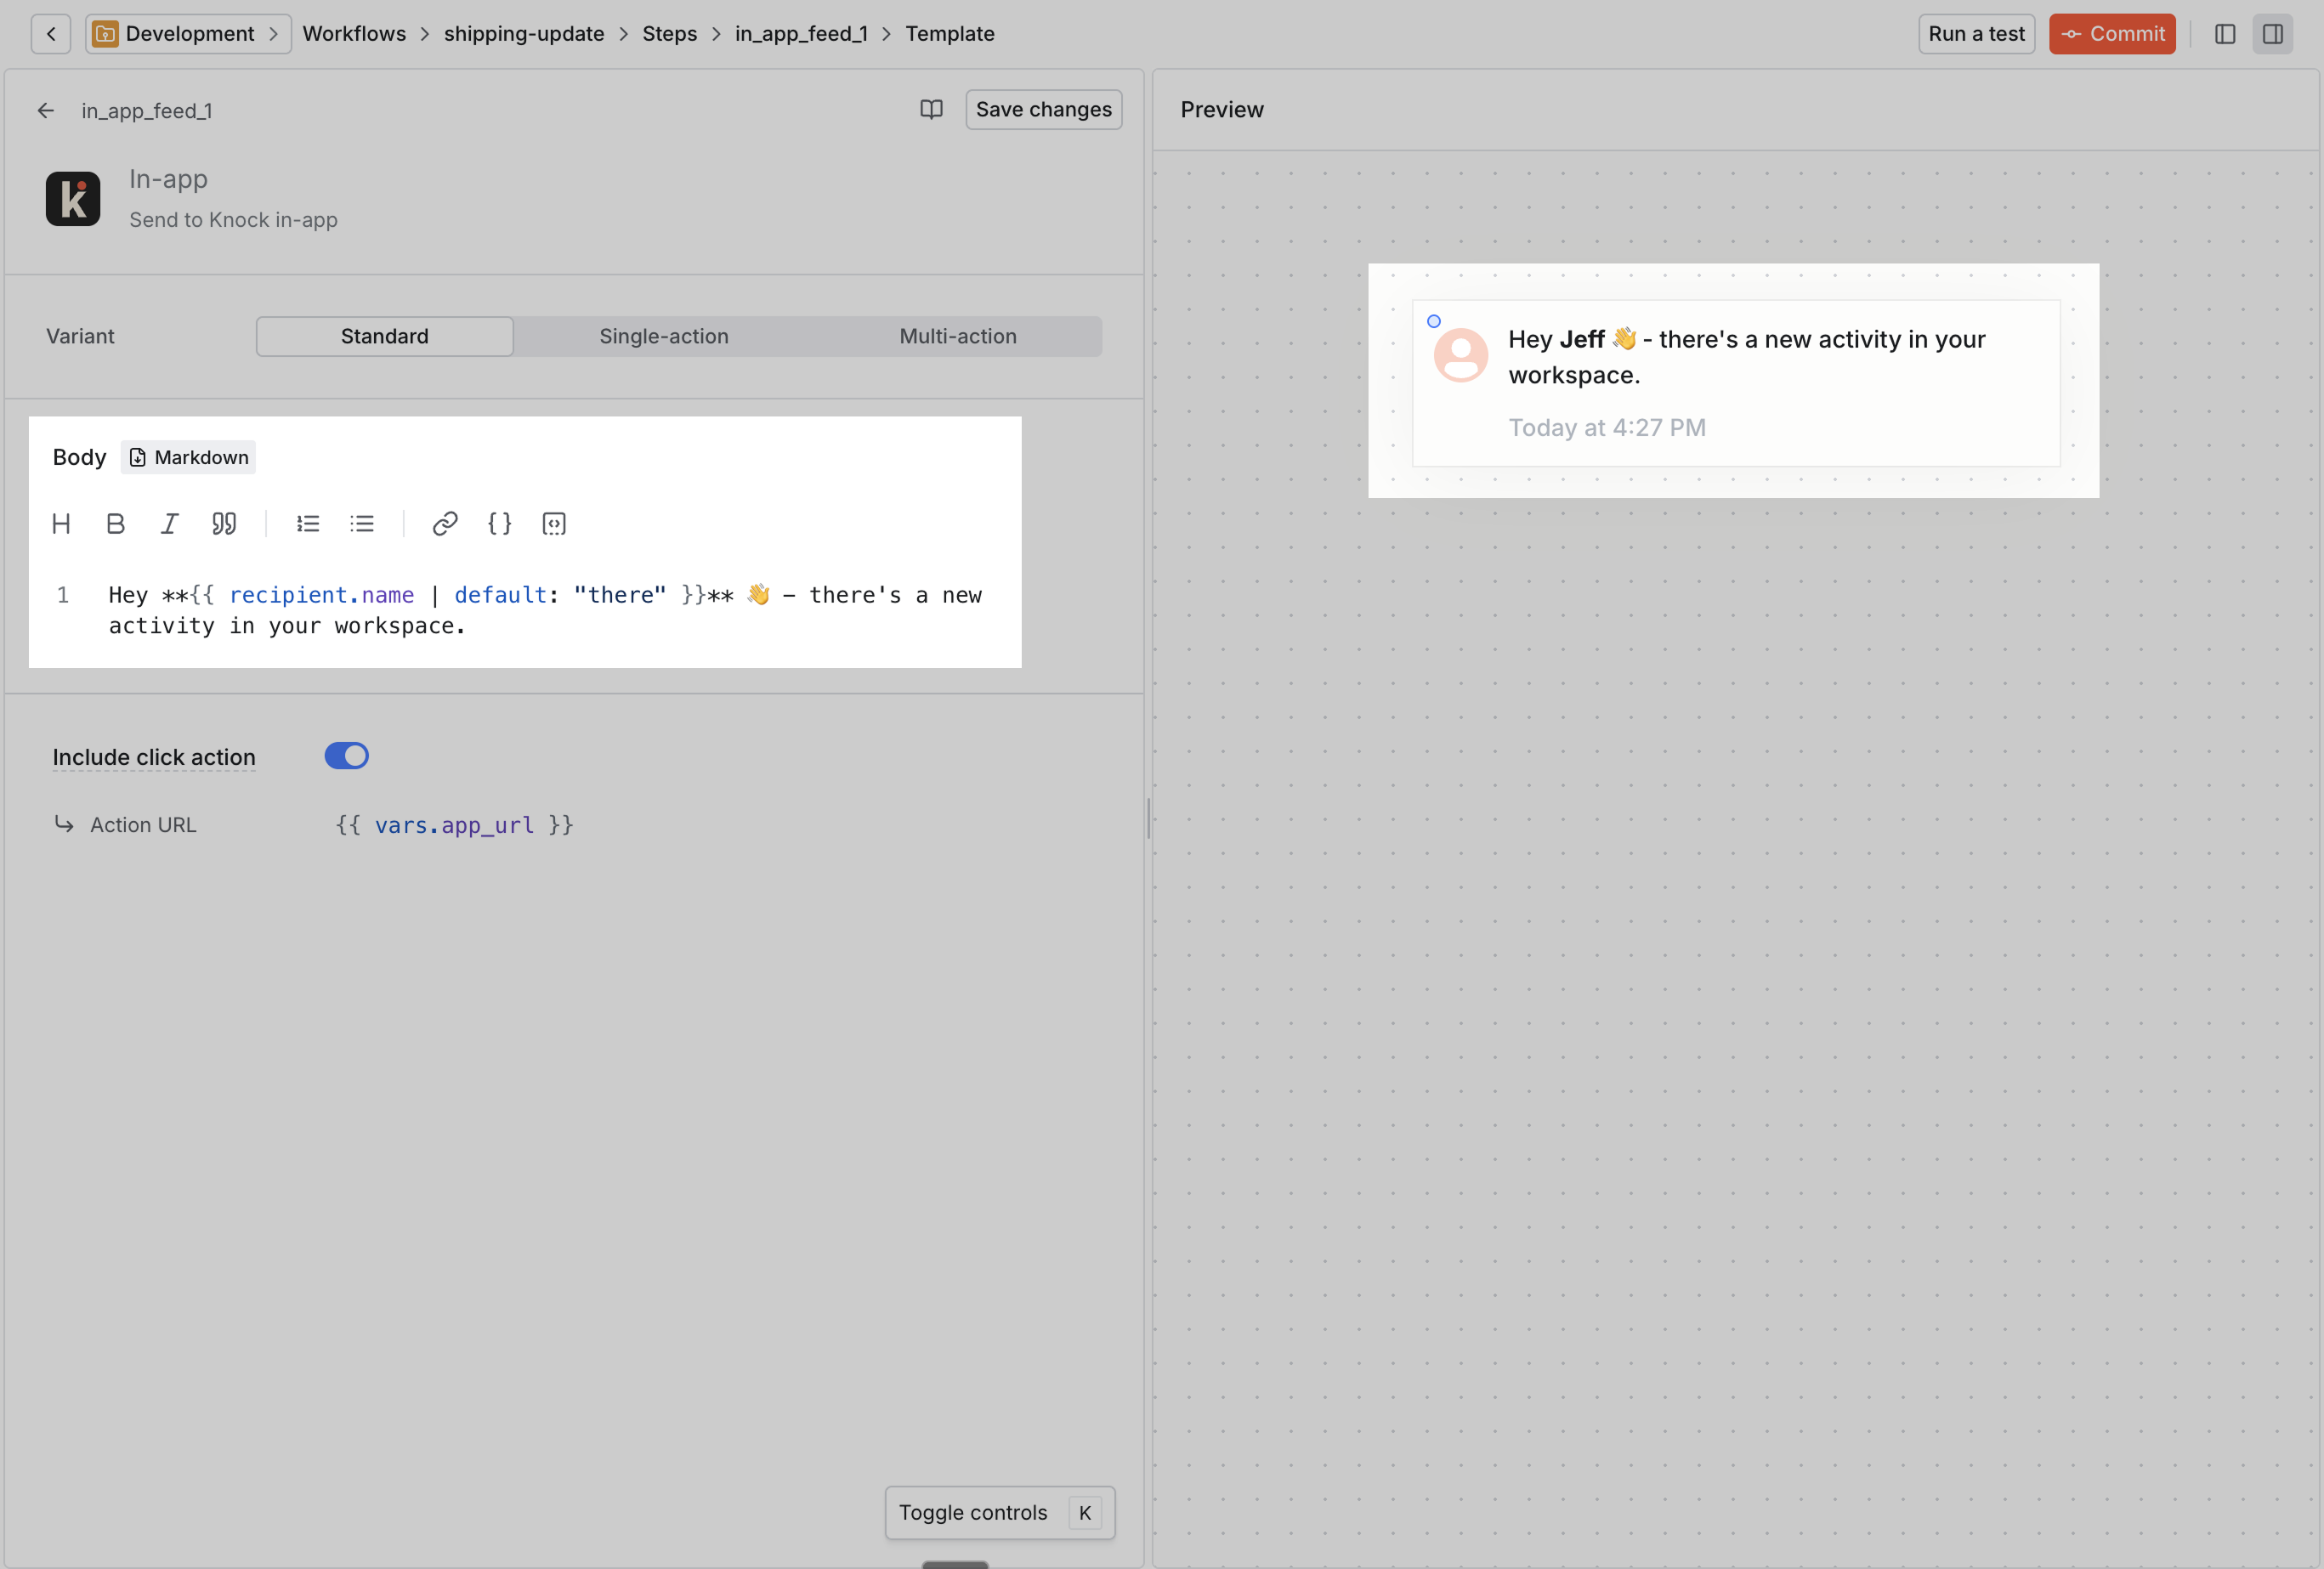
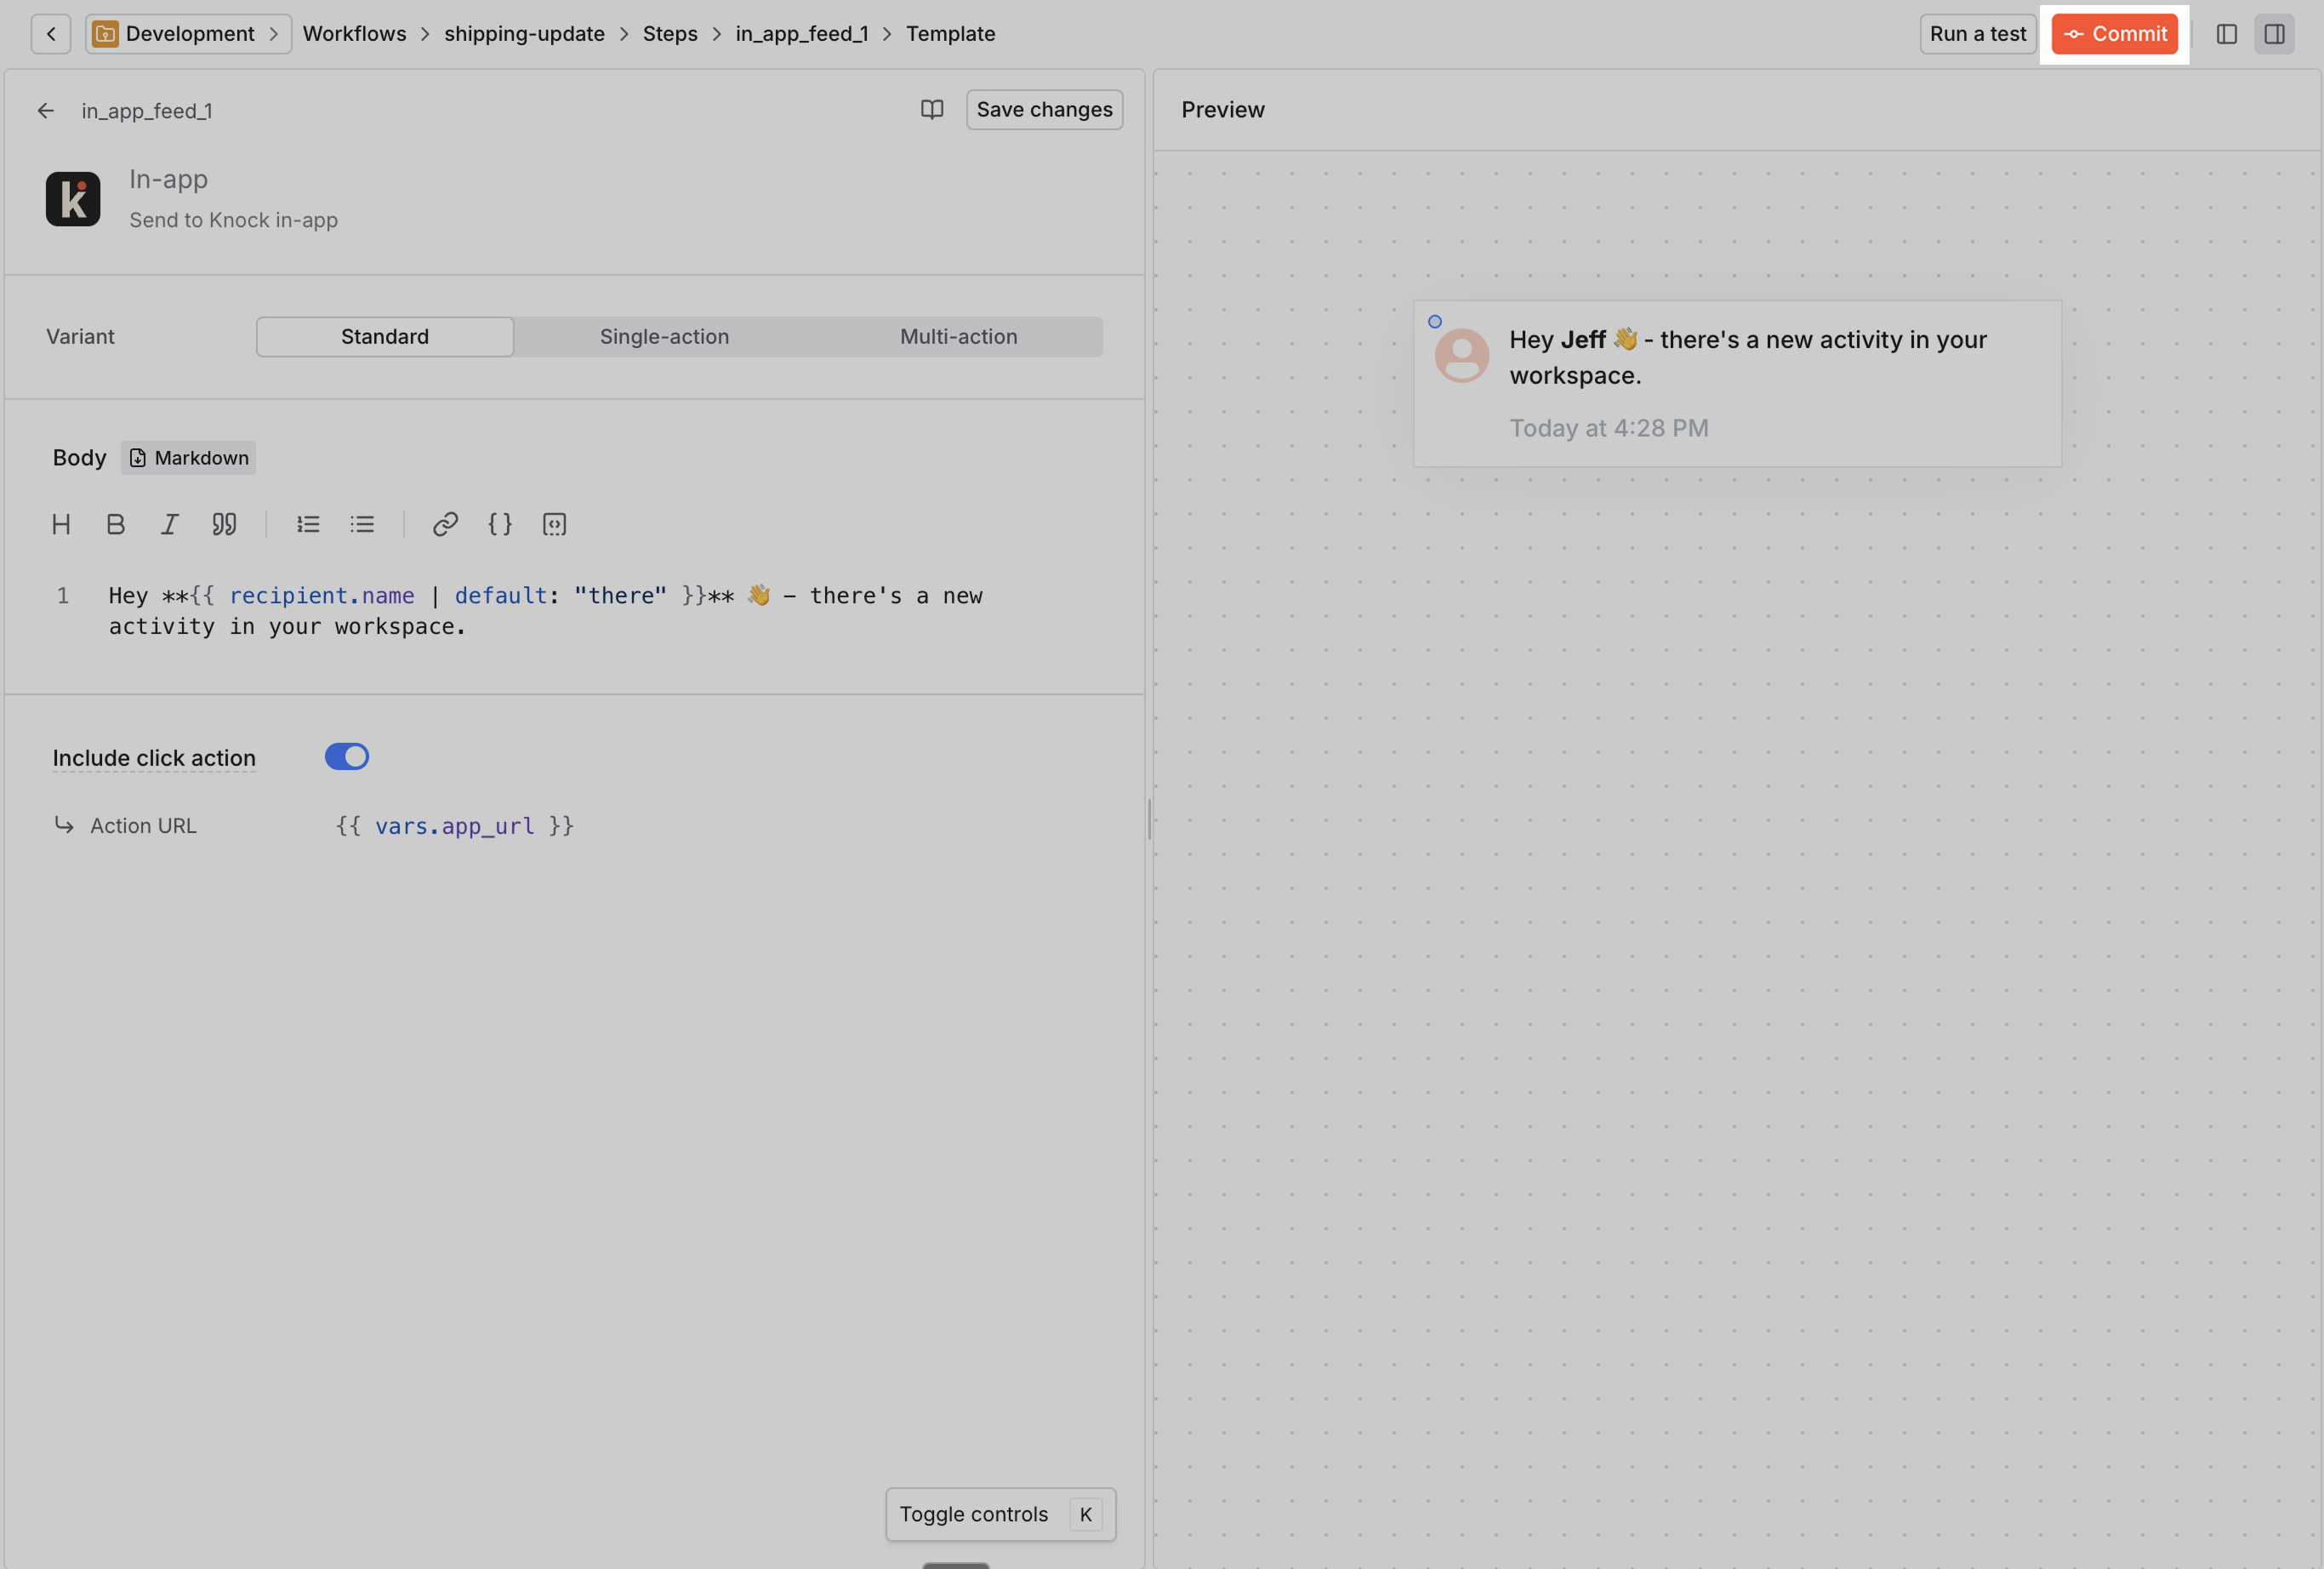
After adding your channel step, you can configure the notification's content by clicking on "Edit content" in the channel's edit step view to see that step's message template.
The template starts with default copy, so we'll just use that for now.
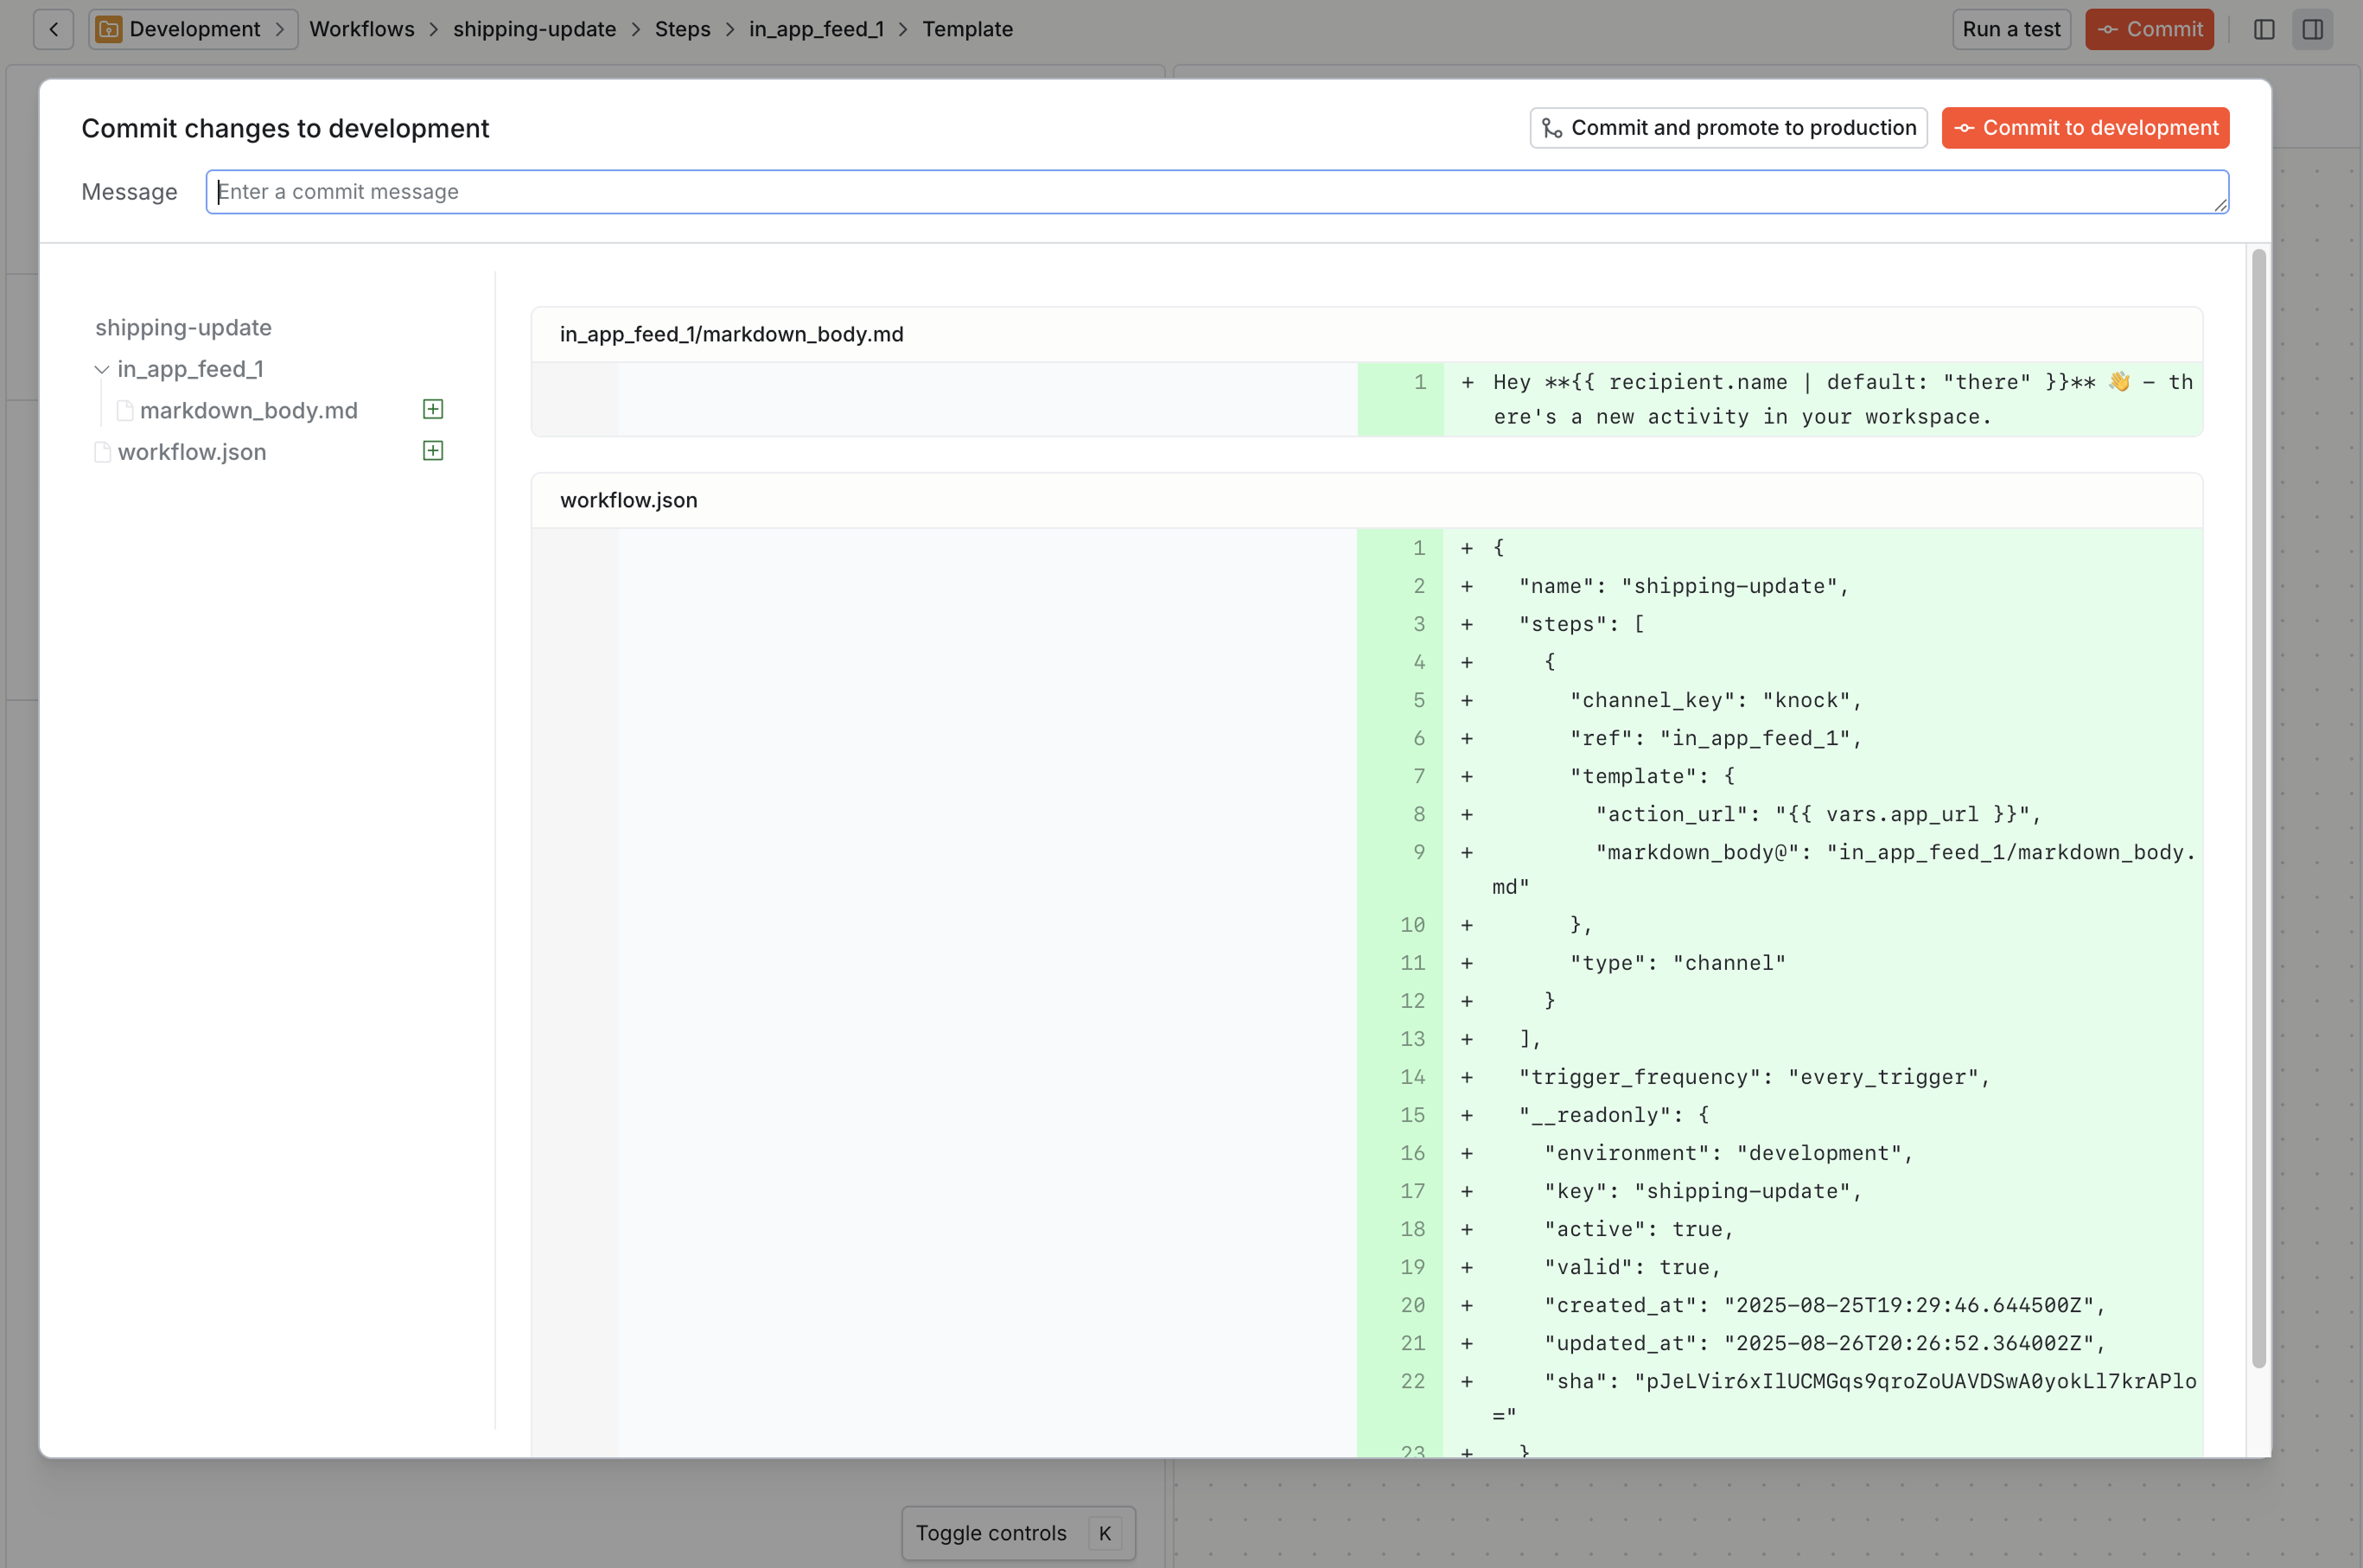
Knock follows a versioning model similar to Git. This means that before you can trigger your new workflow via the API, you'll need to commit it to your current environment to activate the workflow.
You do this using the Commit button in the header of the workflow canvas. You can review your changes using a diff viewer and leave a meaningful commit message about what has changed.
Now we're ready to trigger our workflow via the Knock API. You can also learn more about workflows and channels in Knock via our documentation on designing workflows.
Trigger your workflow
Now, you'll trigger your workflow to a user and produce a notification in the feed. You can do that through the test runner in the workflow editor, or via API call. Your recipient should be the id of the user we identified in our Inbox component.
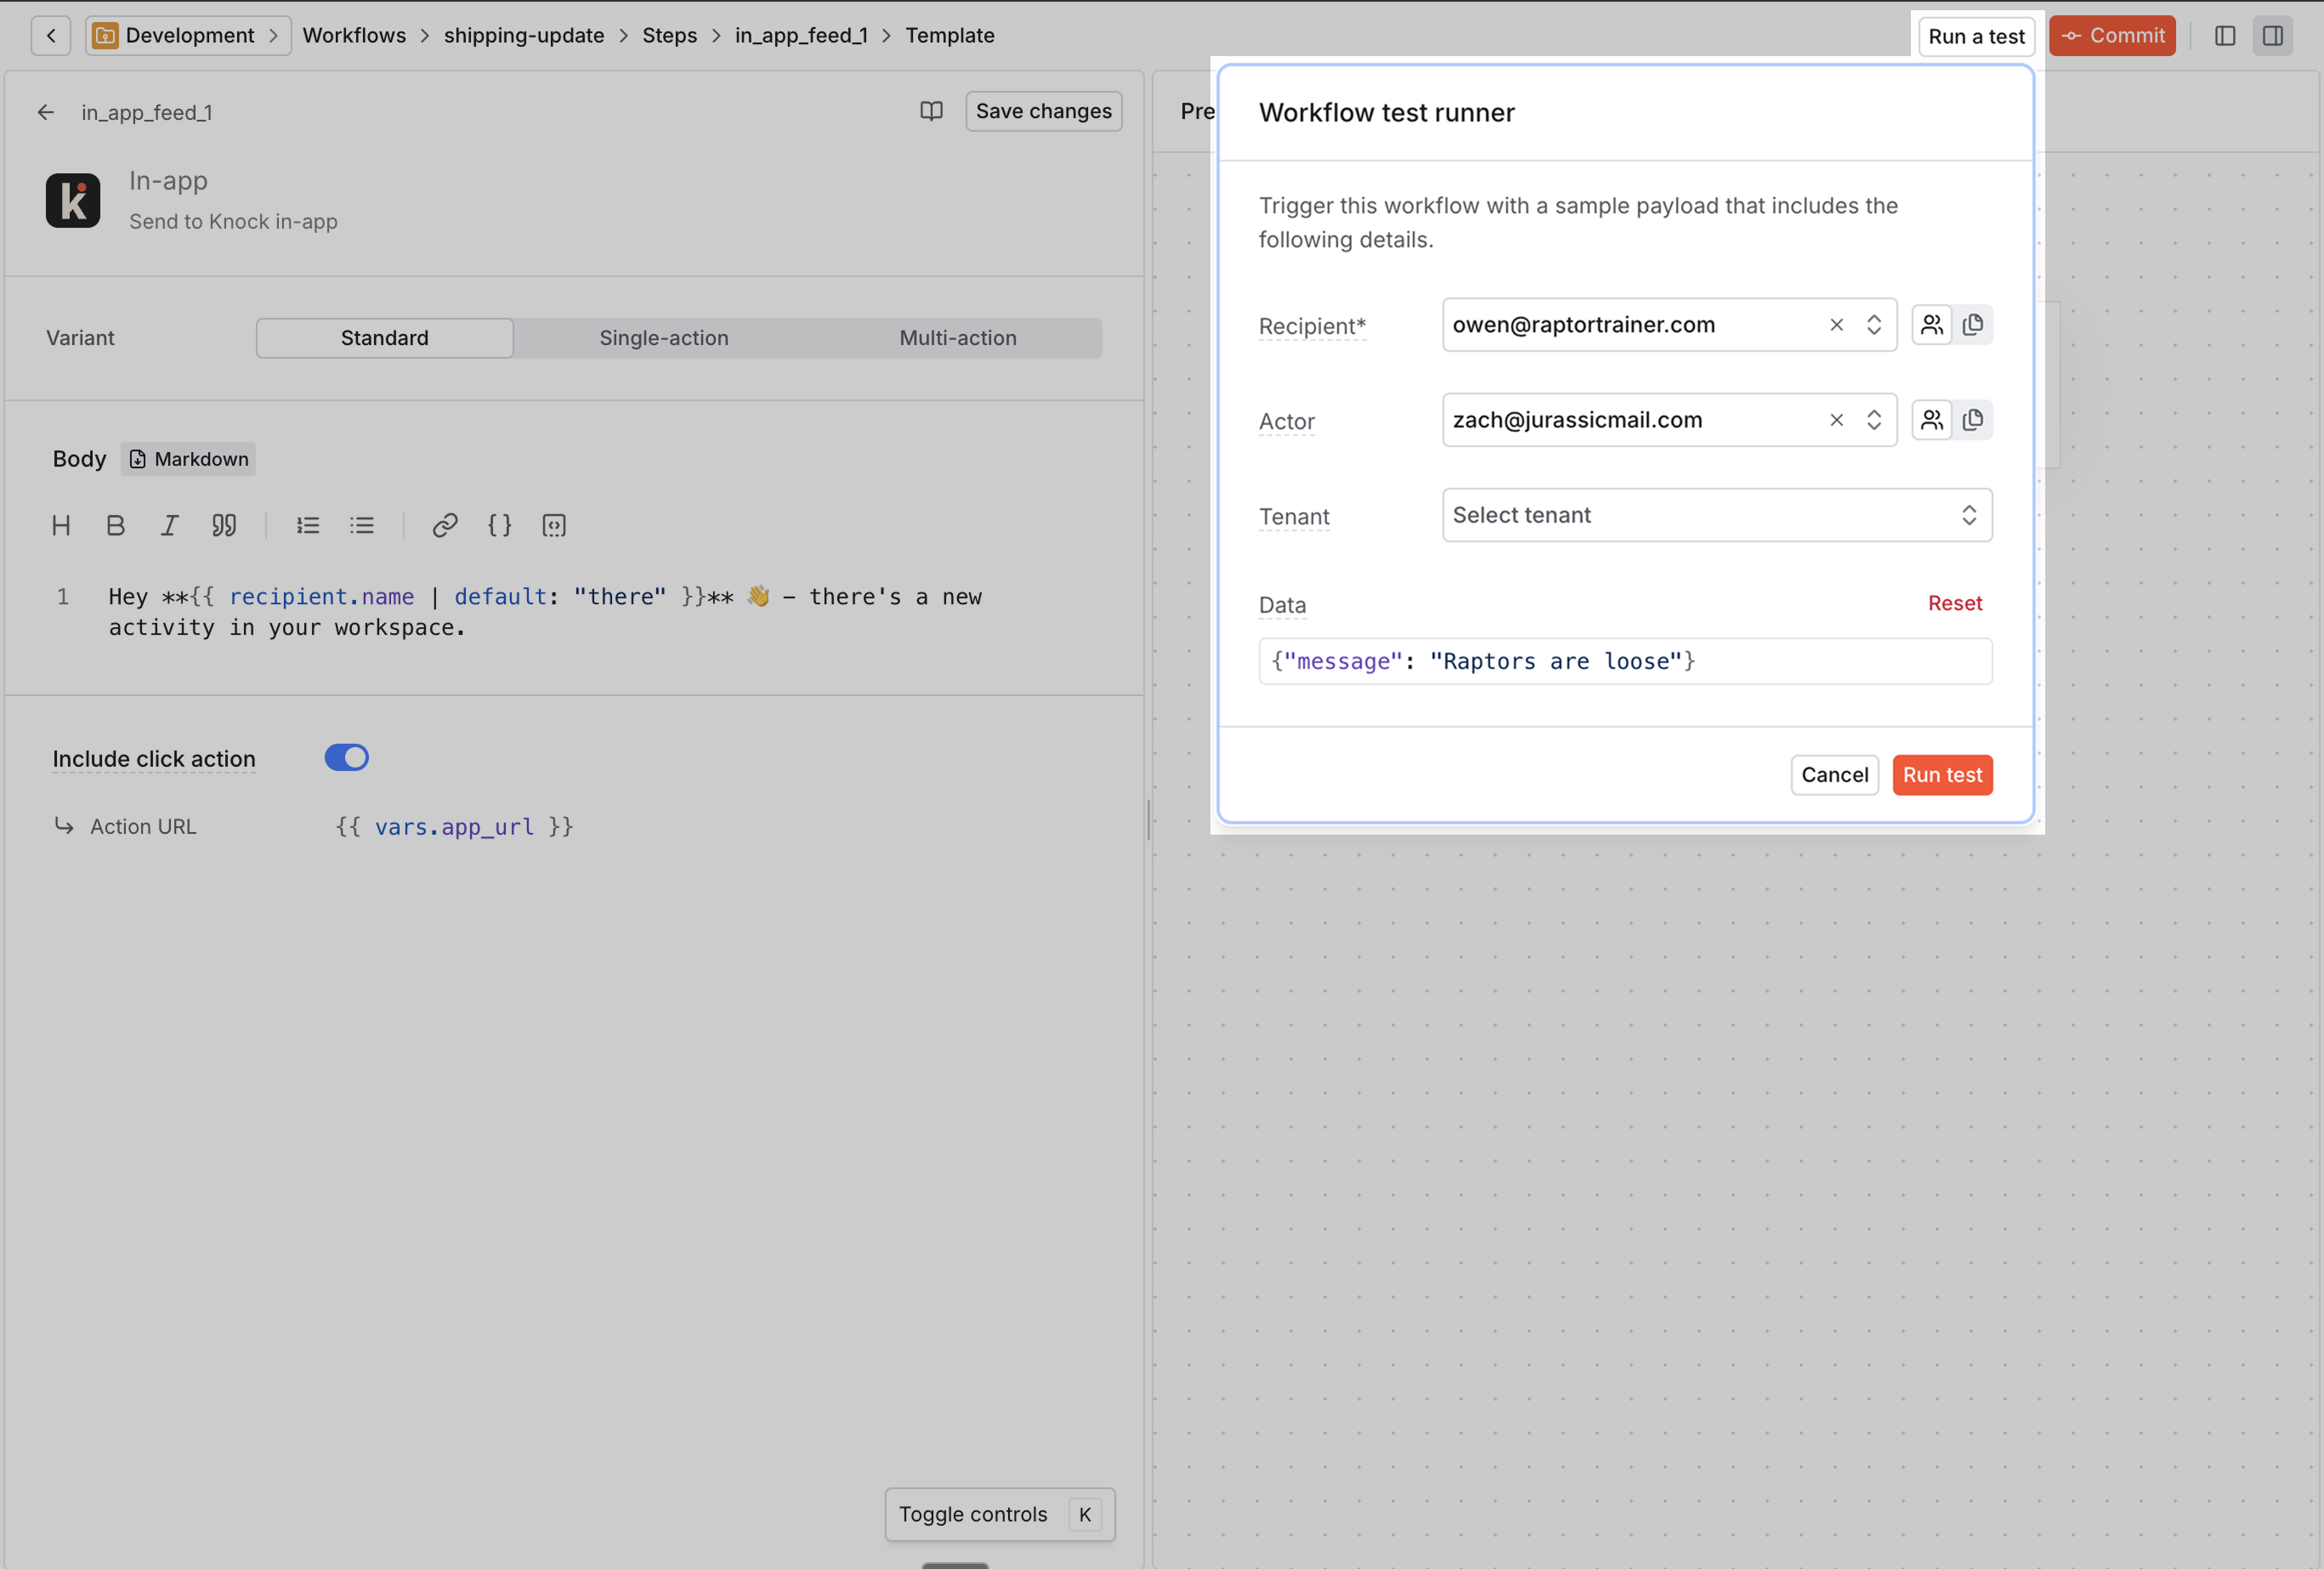
When triggering workflows, you need to provide the following required pieces of data in your call to the Knock API:
recipients– The list of users to notify.data– The variable data that will populate your notification templates. Here you'll use the sample data payload we grabbed in the previous step.
In the example below, we trigger the knock-quickstart workflow for the user we identified with the feed.
Learn more about trigger calls in our API reference.
Publish to production
Knock uses logically separated environments to control the roll-out of your notifications. When you're happy with the way your workflows work and look, ensure they're in your production environment to start sending notifications to your real users. You can create workflows directly in production, or create them in development and promote them to production.
See our going to production checklist to review a complete set of steps you'll need to take to push your workflows to production.
Go deeper
This was a simple overview to send your first notification with Knock. Read on to see how Knock can drive your notification needs, no matter their complexity.