Handling iOS push notifications
Note: We Recommend taking advantage of our KnockAppDelegate to make managing your Push Notifications simpler.
Prerequisites
Before proceeding, ensure you've configured push notifications within your Knock account. For guidance on this initial setup, refer to our Push Notification Configuration Guide.
Step 1: Enabling Push Notifications in Your App
- Configure APNs in Your App:
- Open your project in Xcode.
- Navigate to your app target's Signing & Capabilities tab.
- Click the "+" capability button and add Push Notifications to enable Apple Push Notification service (APNs).
- Enable Background Modes:
- Still in the Signing & Capabilities tab, add the Background Modes capability.
- Check Remote notifications to allow your app to receive silent push notifications.
Step 2: Registering for Push Notifications
Implement the following in your AppDelegate or SceneDelegate to register for push notifications:
KnockAppDelegate:
If using the KnockAppDelegate, this will be handled for you automatically.
Manually:
1class MyAppDelegate: UIResponder, UIApplicationDelegate {
2
3    func application(_ application: UIApplication, didFinishLaunchingWithOptions launchOptions: [UIApplication.LaunchOptionsKey : Any]? = nil) -> Bool {
4        UNUserNotificationCenter.current().delegate = self
5		// Will request push notification permissions, and will automatically register if perms are granted.
6        Knock.shared.requestAndRegisterForPushNotifications()
7
8        // Check if launched from the tap of a notification
9        if let launchOptions = launchOptions,
10           let userInfo = launchOptions[.remoteNotification] as? [String: AnyObject] {
11            pushNotificationTapped(userInfo: userInfo)
12        }
13
14        return true
15    }
16
17    func application(_ application: UIApplication, didRegisterForRemoteNotificationsWithDeviceToken deviceToken: Data) {
18        // Register the token with Knock
19        Task {
20            let channelId = await Knock.shared.getPushChannelId()
21
22            do {
23                let _ = try await Knock.shared.registerTokenForAPNS(channelId: channelId, token: Knock.convertTokenToString(token: deviceToken))
24            } catch {
25               // Handle error
26            }
27        }
28    }
29}
Step 3: Updating the Message Status of a Push Notification.
If a push notification is sent via Knock, it will contain a knock_message_id property that includes the corresponding message Id. This can then be used to update the message status.
KnockAppDelegate:
If using the KnockAppDelegate, this will be handled for you automatically.
Manually:
1class AppDelegate: UIResponder, UIApplicationDelegate {
2 func userNotificationCenter(_ center: UNUserNotificationCenter, willPresent notification: UNNotification, withCompletionHandler completionHandler: @escaping (UNNotificationPresentationOptions) -> Void) {
3 if let messageId = getMessageId(userInfo: notification.request.content.userInfo) {
4 Knock.shared.updateMessageStatus(messageId: messageId, status: .seen) { _ in }
5 }
6 completionHandler(presentationOptions)
7 }
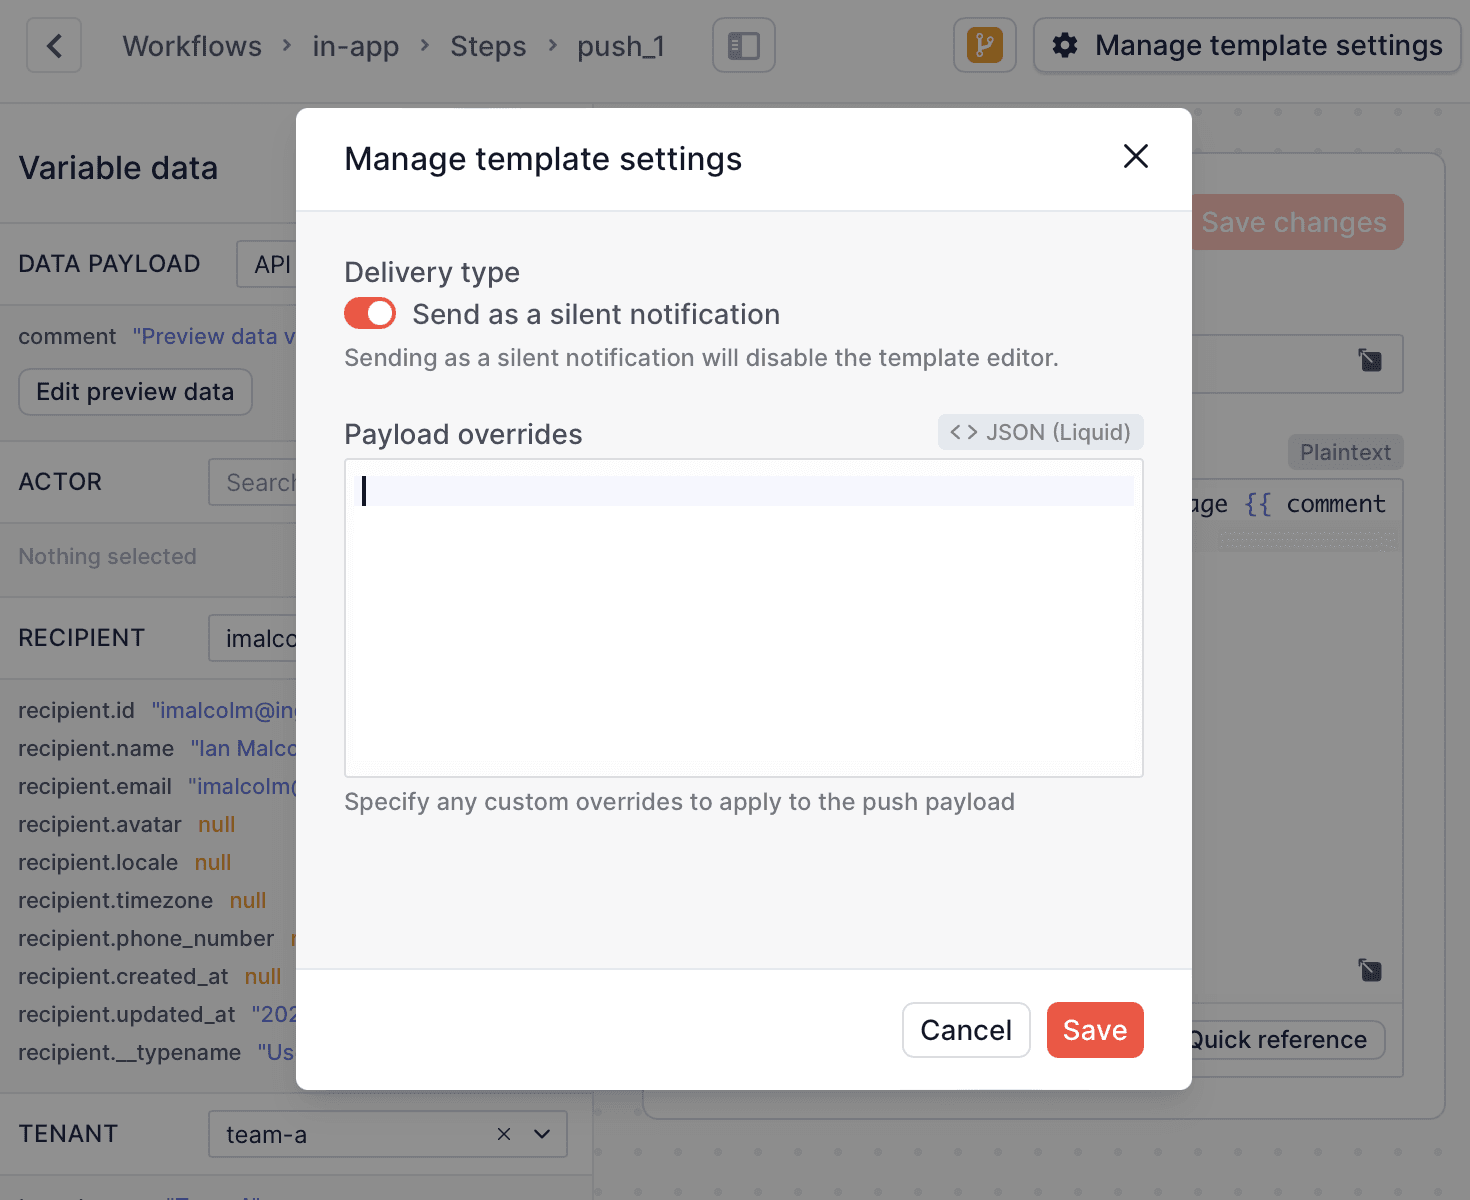
8}Step 4: Configuring Silent Push Notifications
Silent push notifications allow your app to update content in the background without alerting the user. Ensure that your Knock APNs message template has silent notifications enabled.
KnockAppDelegate:
1class MyAppDelegate: KnockAppDelegate {
2     override func pushNotificationDeliveredSilently(userInfo: [AnyHashable : Any], completionHandler: @escaping (UIBackgroundFetchResult) -> Void) {
3         // Pull any information you need out of userInfo, and change the completionHandler value depending on your needs.
4         completionHandler(.noData)
5     }
6}
Manually:
1class MyAppDelegate: UIResponder, UIApplicationDelegate {
2    open func application(_ application: UIApplication, didReceiveRemoteNotification userInfo: [AnyHashable : Any], fetchCompletionHandler completionHandler: @escaping (UIBackgroundFetchResult) -> Void) {
3        // Pull any information you need out of userInfo, and change the completionHandler value depending on your needs.
4         completionHandler(.noData)
5    }
6}
Full Example
Here's the complete AppDelegate implementation:
1class AppDelegate: KnockAppDelegate {
2
3    override func application(_ application: UIApplication, didFinishLaunchingWithOptions launchOptions: [UIApplication.LaunchOptionsKey : Any]? = nil) -> Bool {
4        Task {
5            try? await Knock.shared.setup(publishableKey: Utils.publishableKey, pushChannelId: Utils.apnsChannelId, options: .init(hostname: Utils.hostname, loggingOptions: .verbose))
6        }
7        return super.application(application, didFinishLaunchingWithOptions: launchOptions)
8    }
9
10    override func pushNotificationTapped(userInfo: [AnyHashable : Any]) {
11        super.pushNotificationTapped(userInfo: userInfo)
12        if let deeplink = userInfo["link"] as? String, let url = URL(string: deeplink) {
13            UIApplication.shared.open(url)
14        }
15    }
16
17    override func pushNotificationDeliveredInForeground(notification: UNNotification) -> UNNotificationPresentationOptions {
18        let options = super.pushNotificationDeliveredInForeground(notification: notification)
19        // Handle push notification here
20        return [options]
21    }
22
23    override func pushNotificationDeliveredSilently(userInfo: [AnyHashable : Any], completionHandler: @escaping (UIBackgroundFetchResult) -> Void) {
24        // Handle silent push notification here
25        completionHandler(.noData)
26    }
27}
Using FCM in iOS
If you prefer to use Firebase Cloud Messaging (FCM) within your iOS app, you can follow the same steps outlined above for push notifications with a few modifications to your AppDelegate.
Step 1: Configure Firebase
In your application(_:didFinishLaunchingWithOptions:) method, add the following:
-
Initialize Firebase:
1FirebaseApp.configure() -
Set the Messaging Delegate:
1Messaging.messaging().delegate = self -
Setup Knock:
1Task {
2    try? await Knock.shared.setup(
3        publishableKey: Utils.publishableKey,
4        pushChannelId: Utils.apnsChannelId,
5        options: .init(hostname: Utils.hostname, loggingOptions: .verbose)
6    )
7}
Step 2: Override Push Notification Registration Methods
Override the application(_:didRegisterForRemoteNotificationsWithDeviceToken:) method to prevent the KnockAppDelegate from handling this automatically:
1override func application(_ application: UIApplication, didRegisterForRemoteNotificationsWithDeviceToken deviceToken: Data) {}Step 3: Implement MessagingDelegate
Extend your AppDelegate to conform to MessagingDelegate and implement the messaging(_:didReceiveRegistrationToken:) method:
1extension AppDelegate: MessagingDelegate {
2    func messaging(_ messaging: Messaging, didReceiveRegistrationToken fcmToken: String?) {
3        Task {
4            if let channelId = await Knock.shared.getPushChannelId(), let token = fcmToken {
5                let _ = try? await Knock.shared.registerTokenForAPNS(channelId: channelId, token: token)
6            }
7        }
8    }
9}
Full Example
Here's the complete AppDelegate implementation with FCM support:
1class AppDelegate: KnockAppDelegate {
2
3    override func application(_ application: UIApplication, didFinishLaunchingWithOptions launchOptions: [UIApplication.LaunchOptionsKey : Any]? = nil) -> Bool {
4        // Step 1: Configure Firebase and Knock
5        FirebaseApp.configure()
6        Messaging.messaging().delegate = self
7
8        Task {
9            try? await Knock.shared.setup(
10                publishableKey: Utils.publishableKey,
11                pushChannelId: Utils.apnsChannelId,
12                options: .init(hostname: Utils.hostname, loggingOptions: .verbose)
13            )
14        }
15        return super.application(application, didFinishLaunchingWithOptions: launchOptions)
16    }
17
18    // Step 2: Override registration for remote notifications
19    override func application(_ application: UIApplication, didRegisterForRemoteNotificationsWithDeviceToken deviceToken: Data) {}
20
21    override func pushNotificationTapped(userInfo: [AnyHashable : Any]) {
22        super.pushNotificationTapped(userInfo: userInfo)
23        if let deeplink = userInfo["link"] as? String, let url = URL(string: deeplink) {
24            UIApplication.shared.open(url)
25        }
26    }
27
28    override func pushNotificationDeliveredInForeground(notification: UNNotification) -> UNNotificationPresentationOptions {
29        let options = super.pushNotificationDeliveredInForeground(notification: notification)
30        return [options]
31    }
32
33    override func pushNotificationDeliveredSilently(userInfo: [AnyHashable : Any], completionHandler: @escaping (UIBackgroundFetchResult) -> Void) {
34        completionHandler(.noData)
35    }
36}
37
38// Step 3: Implement MessagingDelegate
39extension AppDelegate: MessagingDelegate {
40    func messaging(_ messaging: Messaging, didReceiveRegistrationToken fcmToken: String?) {
41        Task {
42            if let channelId = await Knock.shared.getPushChannelId(), let token = fcmToken {
43                let _ = try? await Knock.shared.registerTokenForAPNS(channelId: channelId, token: token)
44            }
45        }
46    }
47}