How to send WhatsApp notifications with Knock
Get started sending WhatsApp notifications with Knock.
Knock integrates with WhatsApp to send notifications to your recipients via the WhatsApp Business API. This integration enables you to send template-based messages directly to your users' WhatsApp accounts, providing a familiar and widely-used communication channel for important notifications.
Features
#- Per environment configuration
- Sandbox mode
Getting started
#Before you set up your WhatsApp chat channel in Knock, you'll need to take the following steps in WhatsApp.
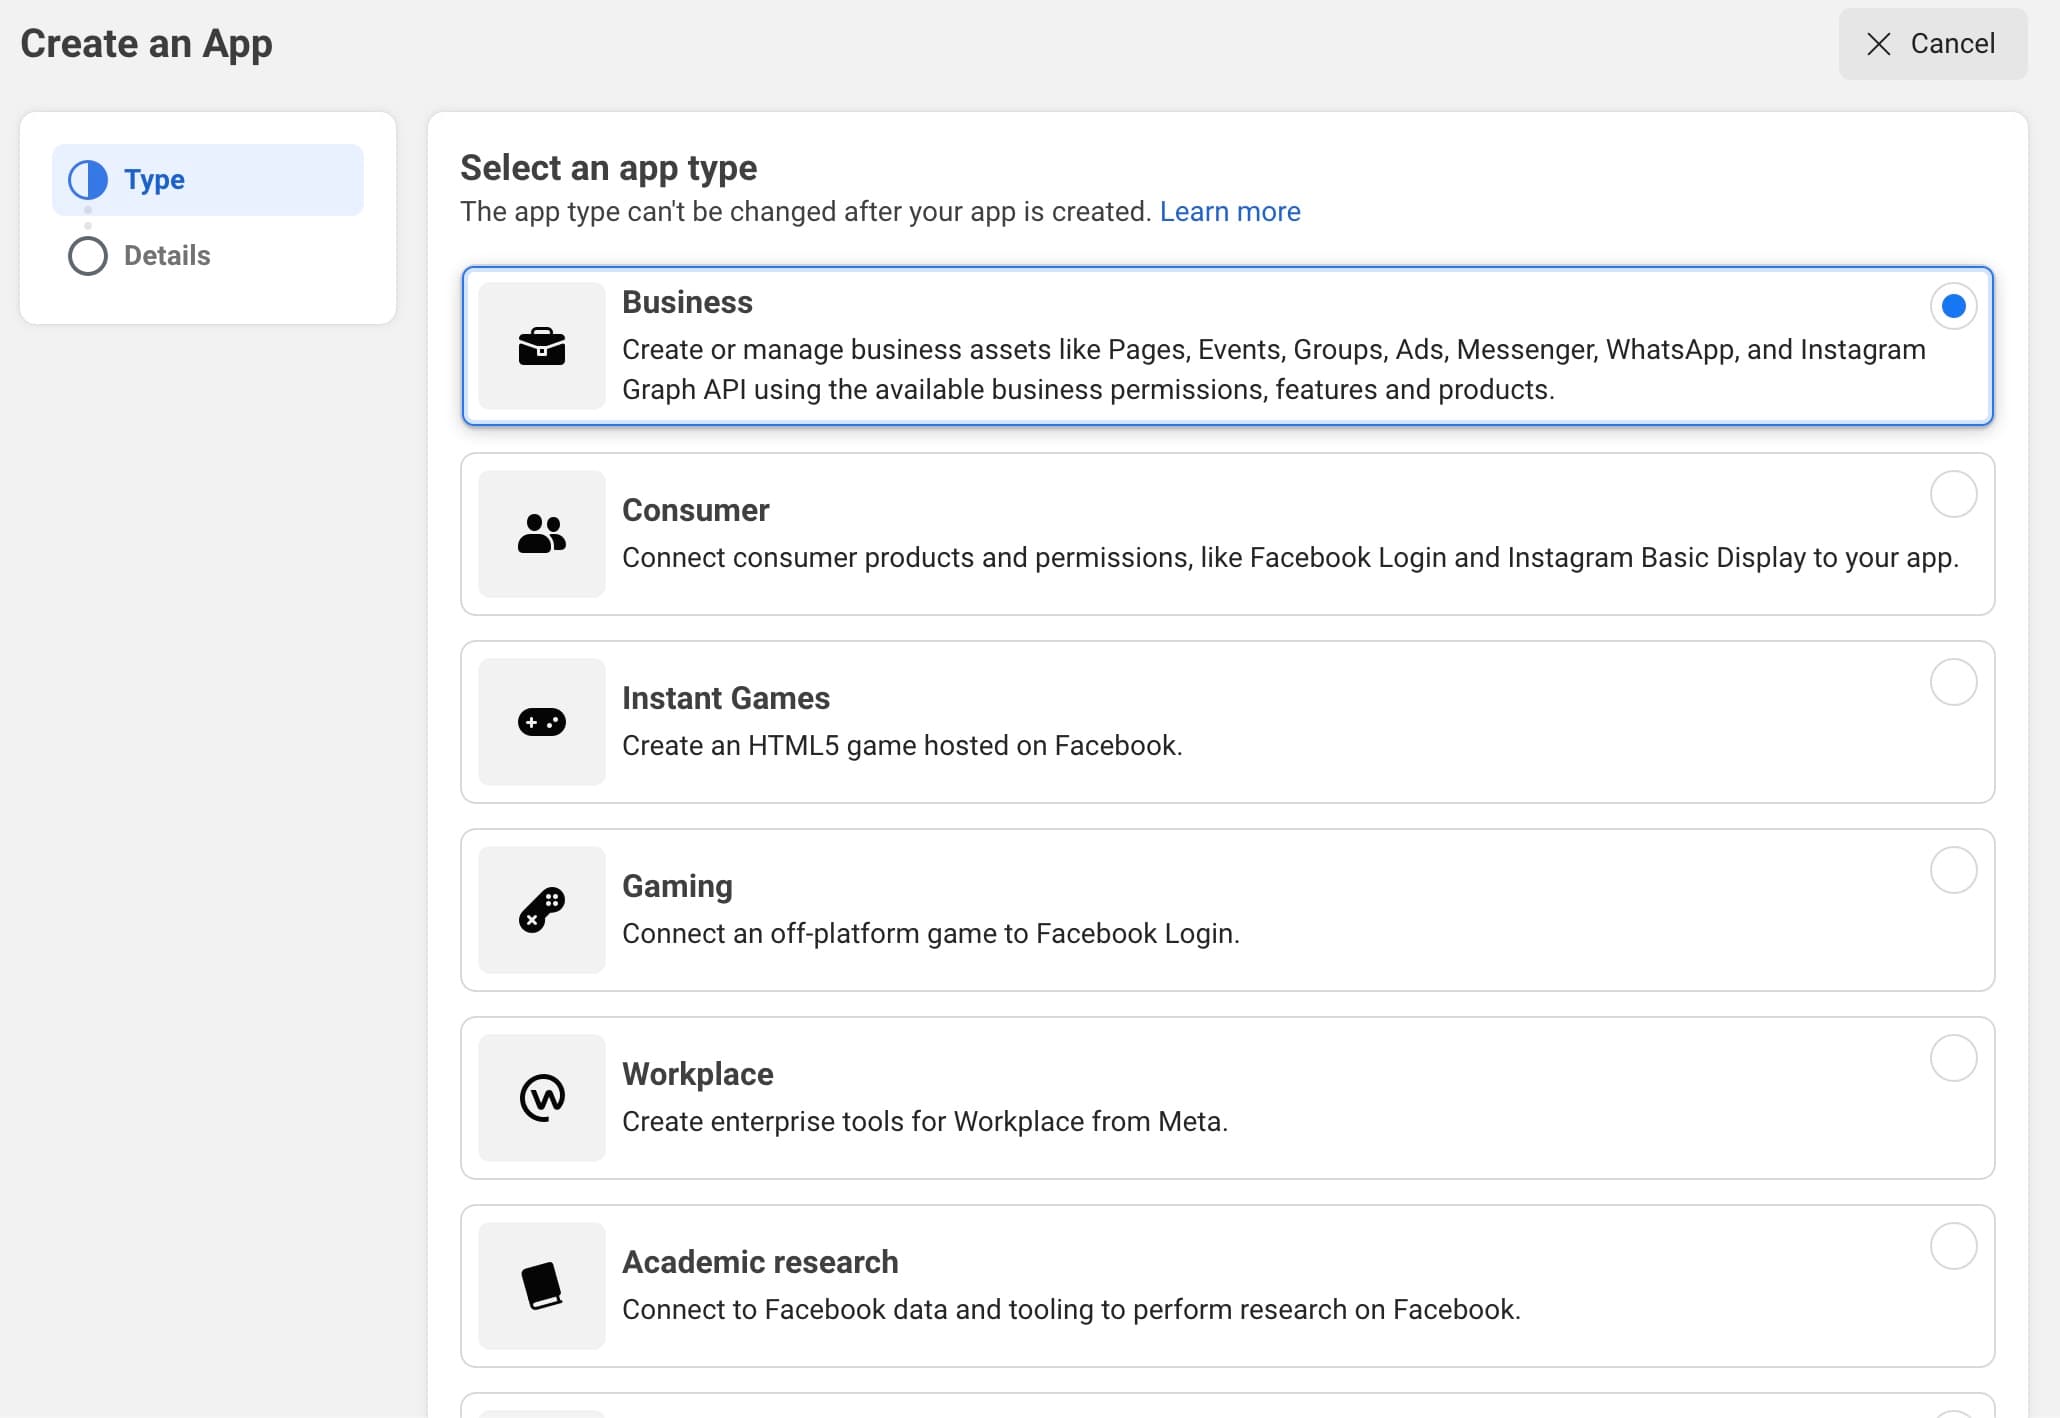
1. Create a business app on Facebook
#Login to your Facebook developer account and click on the "Create app" button, then choose the first "Business" type app and complete the details with your personal information.
2. Add WhatsApp as a product
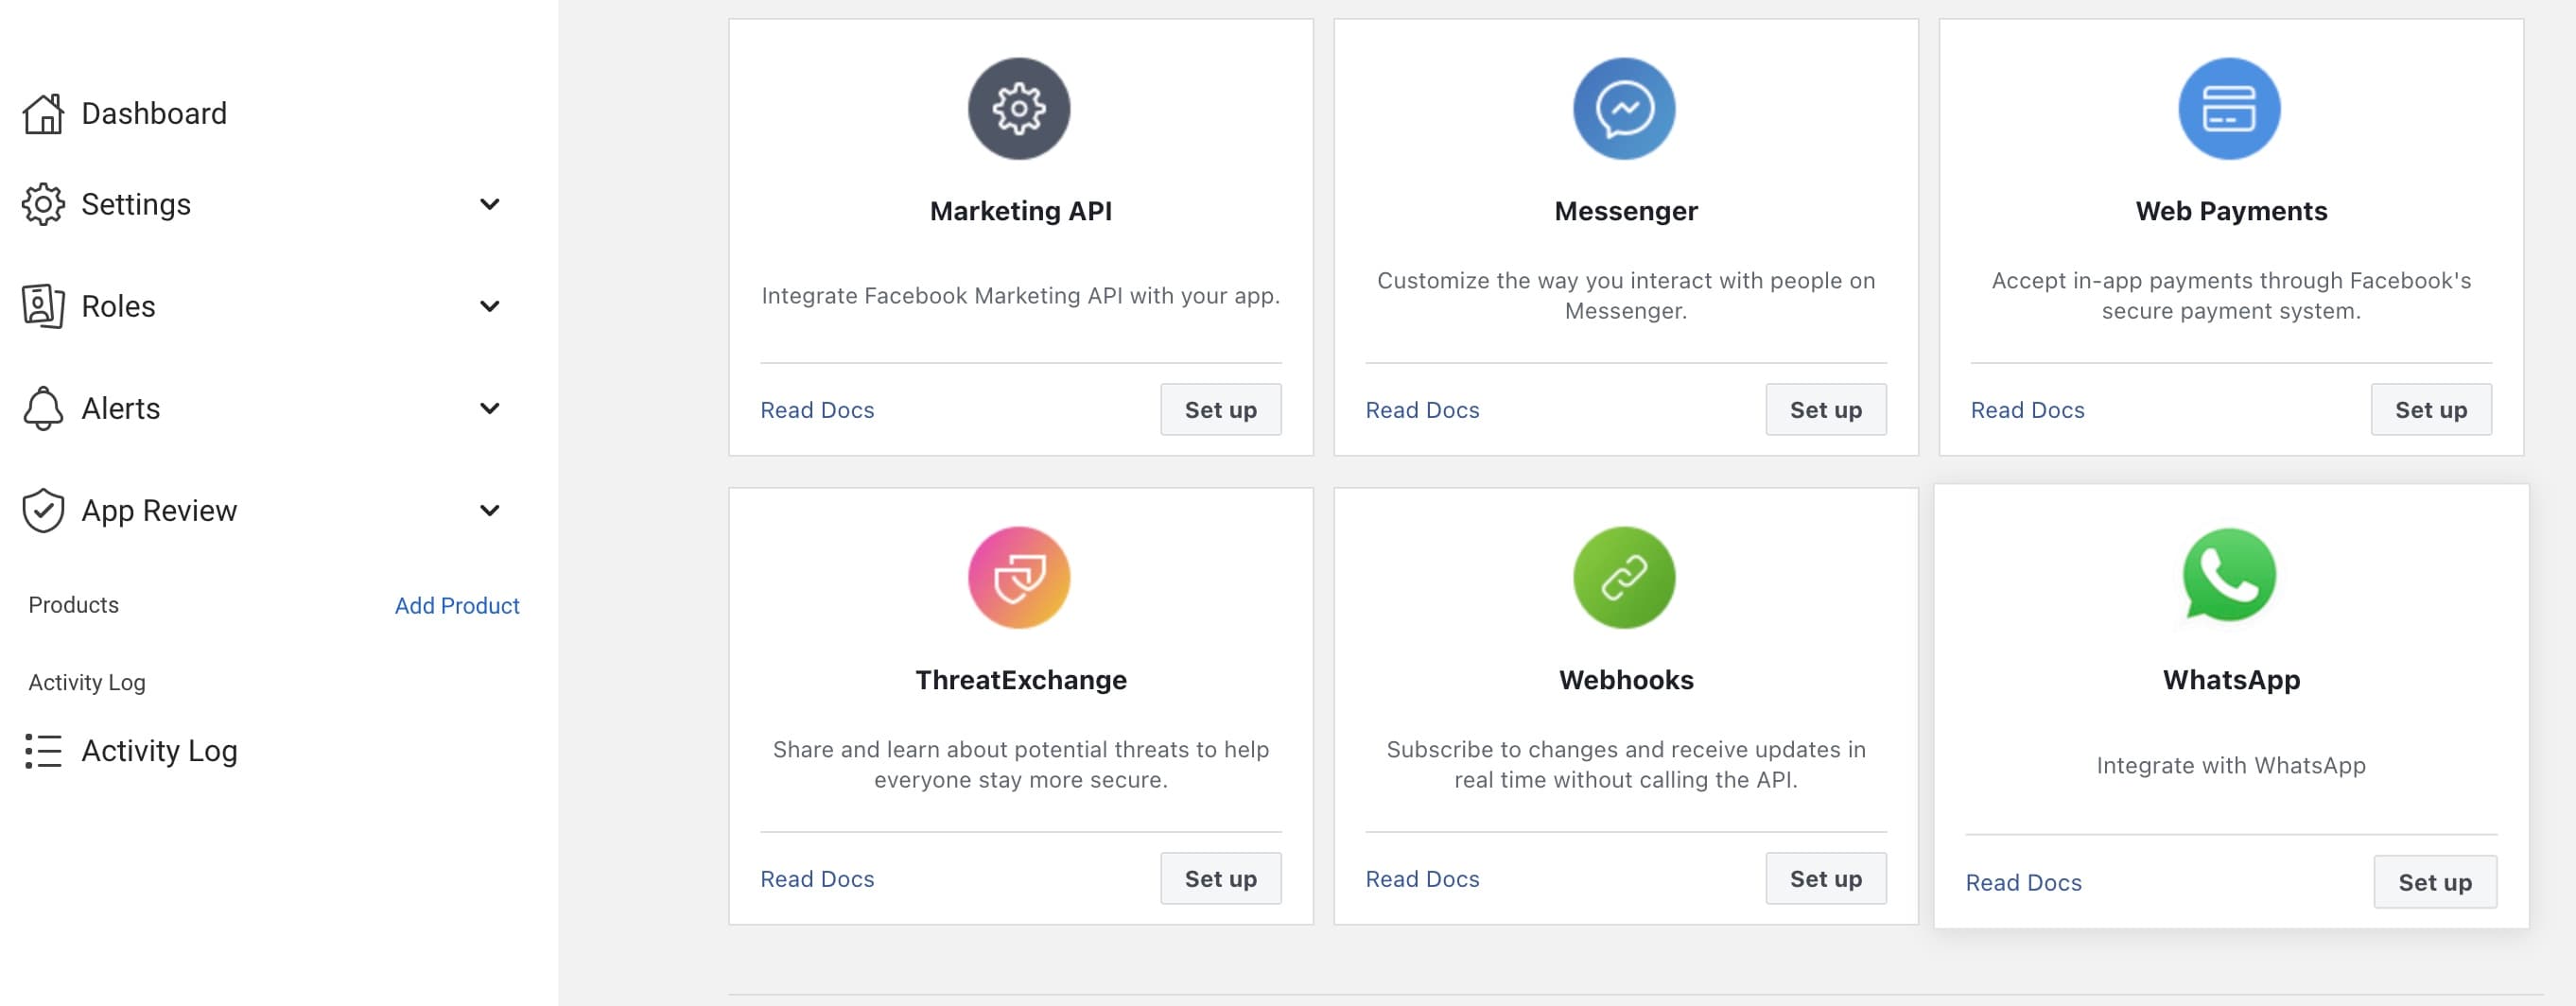
#Now that your app is created you need to add a product, scroll down to find the "WhatsApp" product and click "Set up." After this you will be redirected to the WhatsApp get started page, here you can "create a business account" or use an existing one.
3. Send a test message
#In case you want to send a test message, you can go to WhatsApp/first steps, where you will find the temporary access token, phone number id and a curl of send messages.
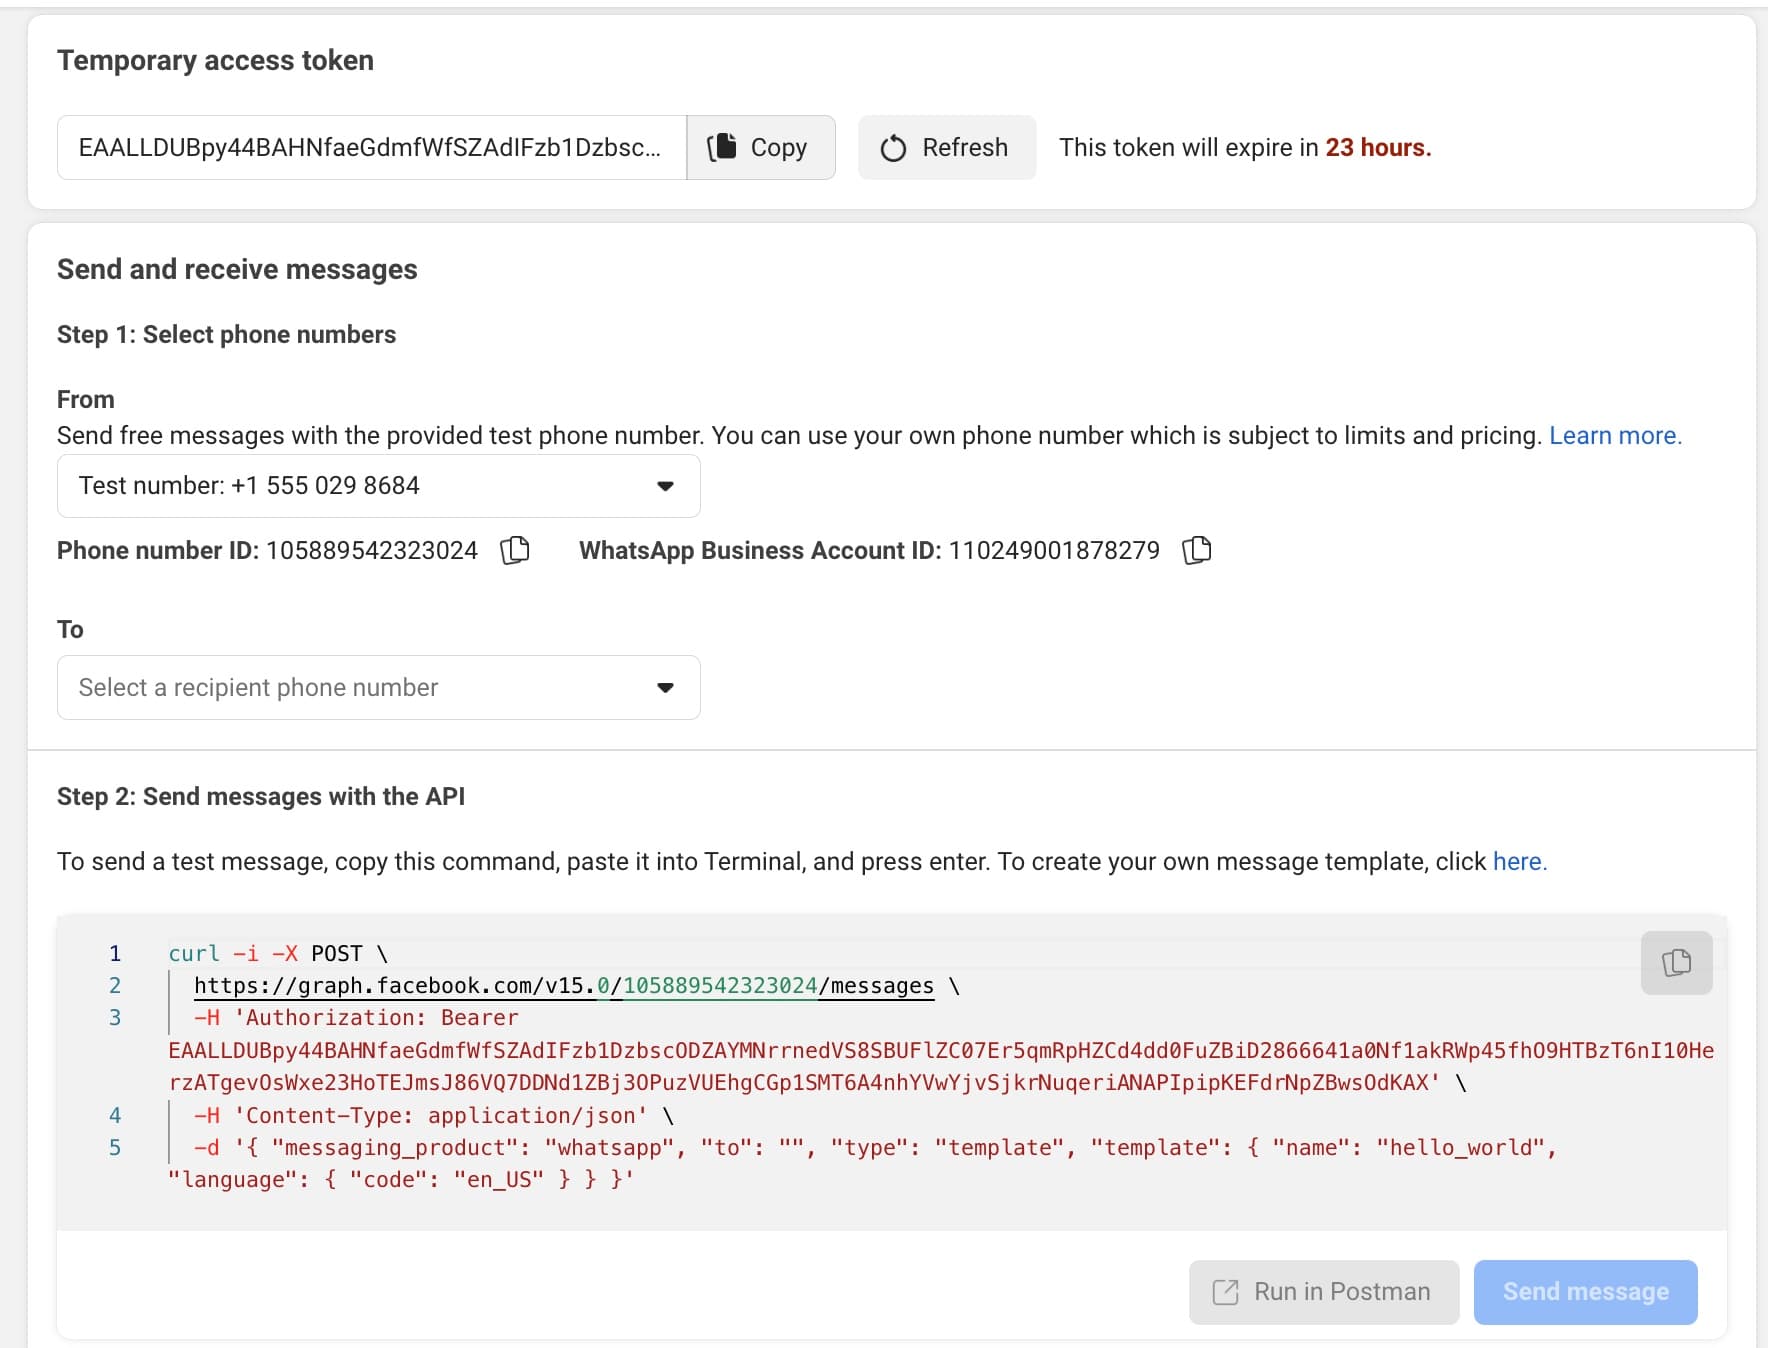
Note: The phone_number_id is from a Facebook test phone number which cannot be used in production.
Then you need to add your personal number in the recipient phone number field and click "Send message"
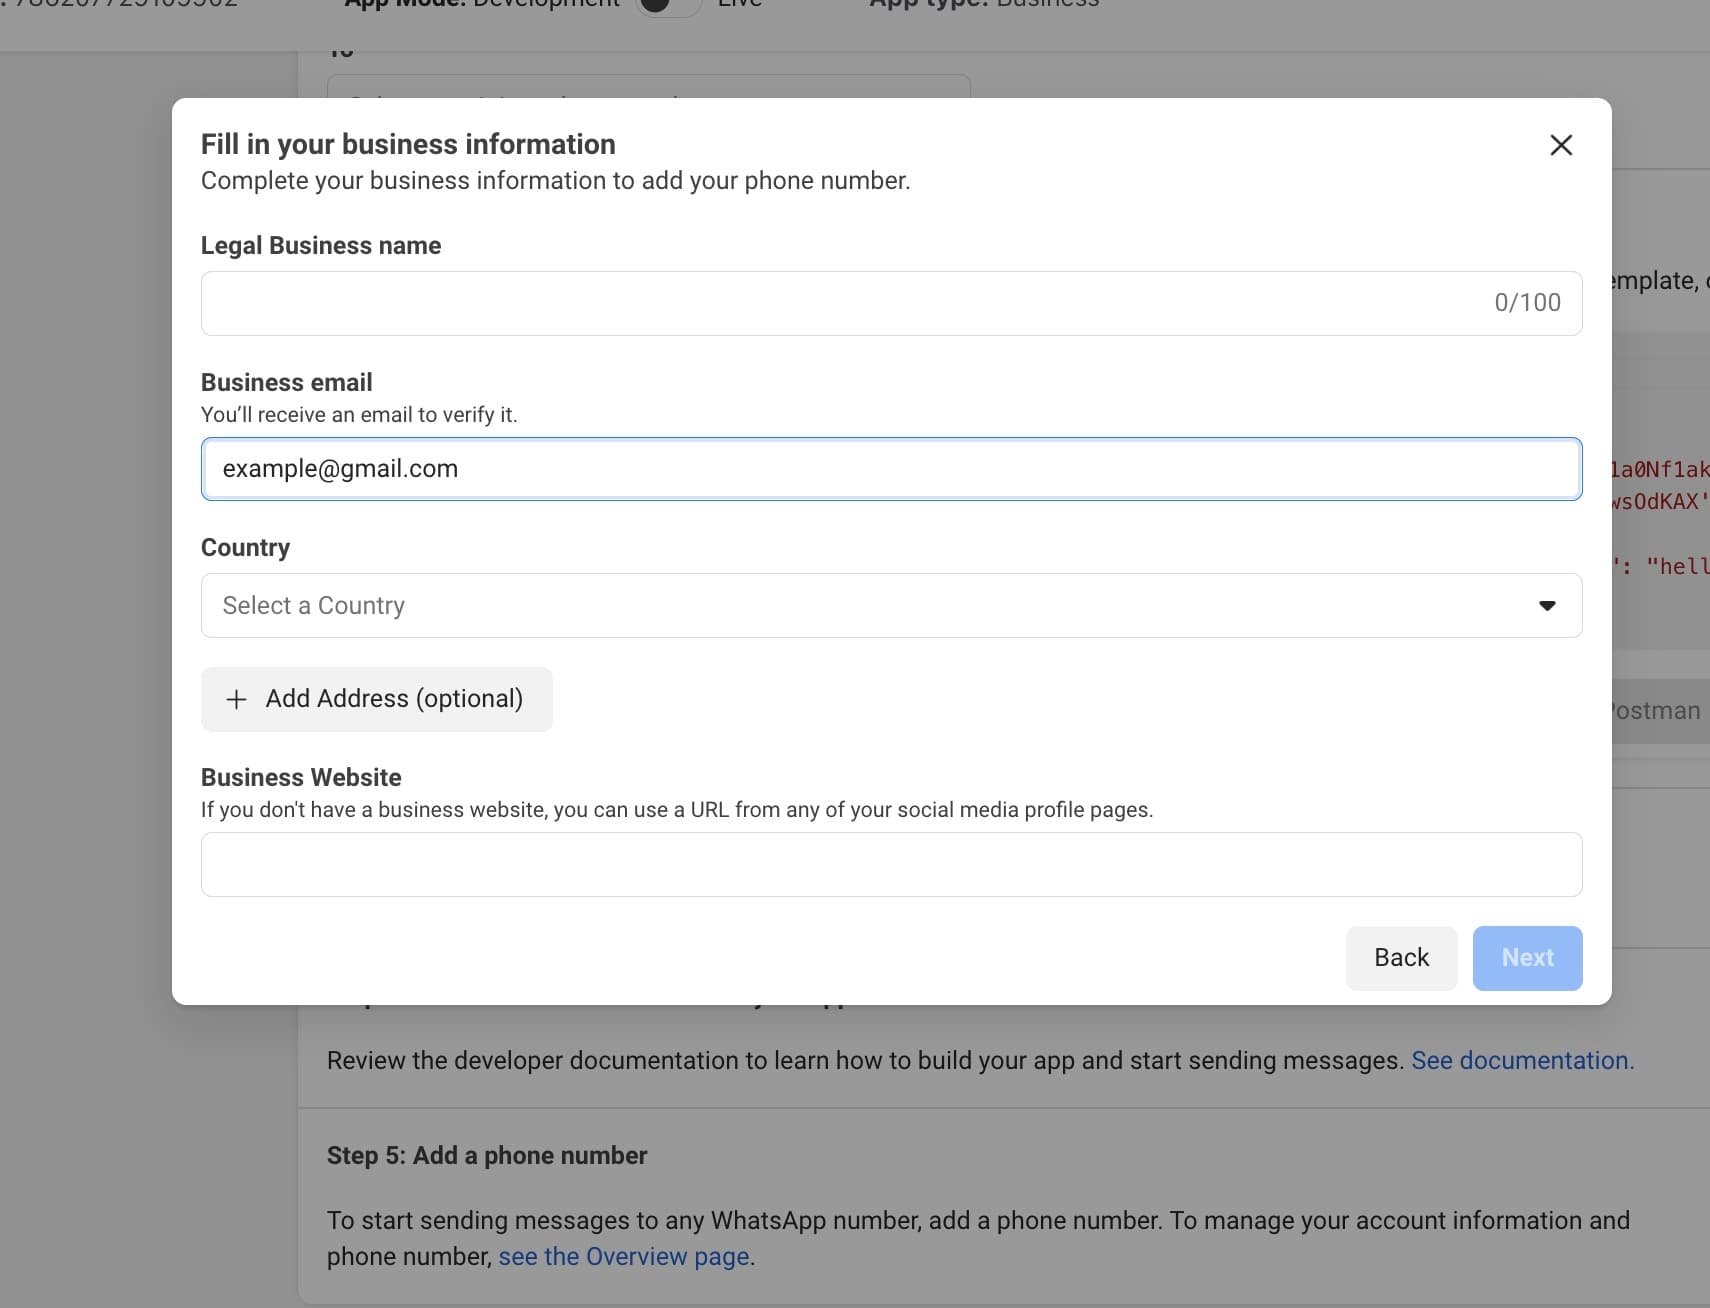
4. Add a valid business phone number
#Add a business phone number to send messages from. You can do this using the Add Phone Number button which is below the current page.
5. Generate an access token
#Because the testing access token only last 24 hours, we need to create a token that can last forever:
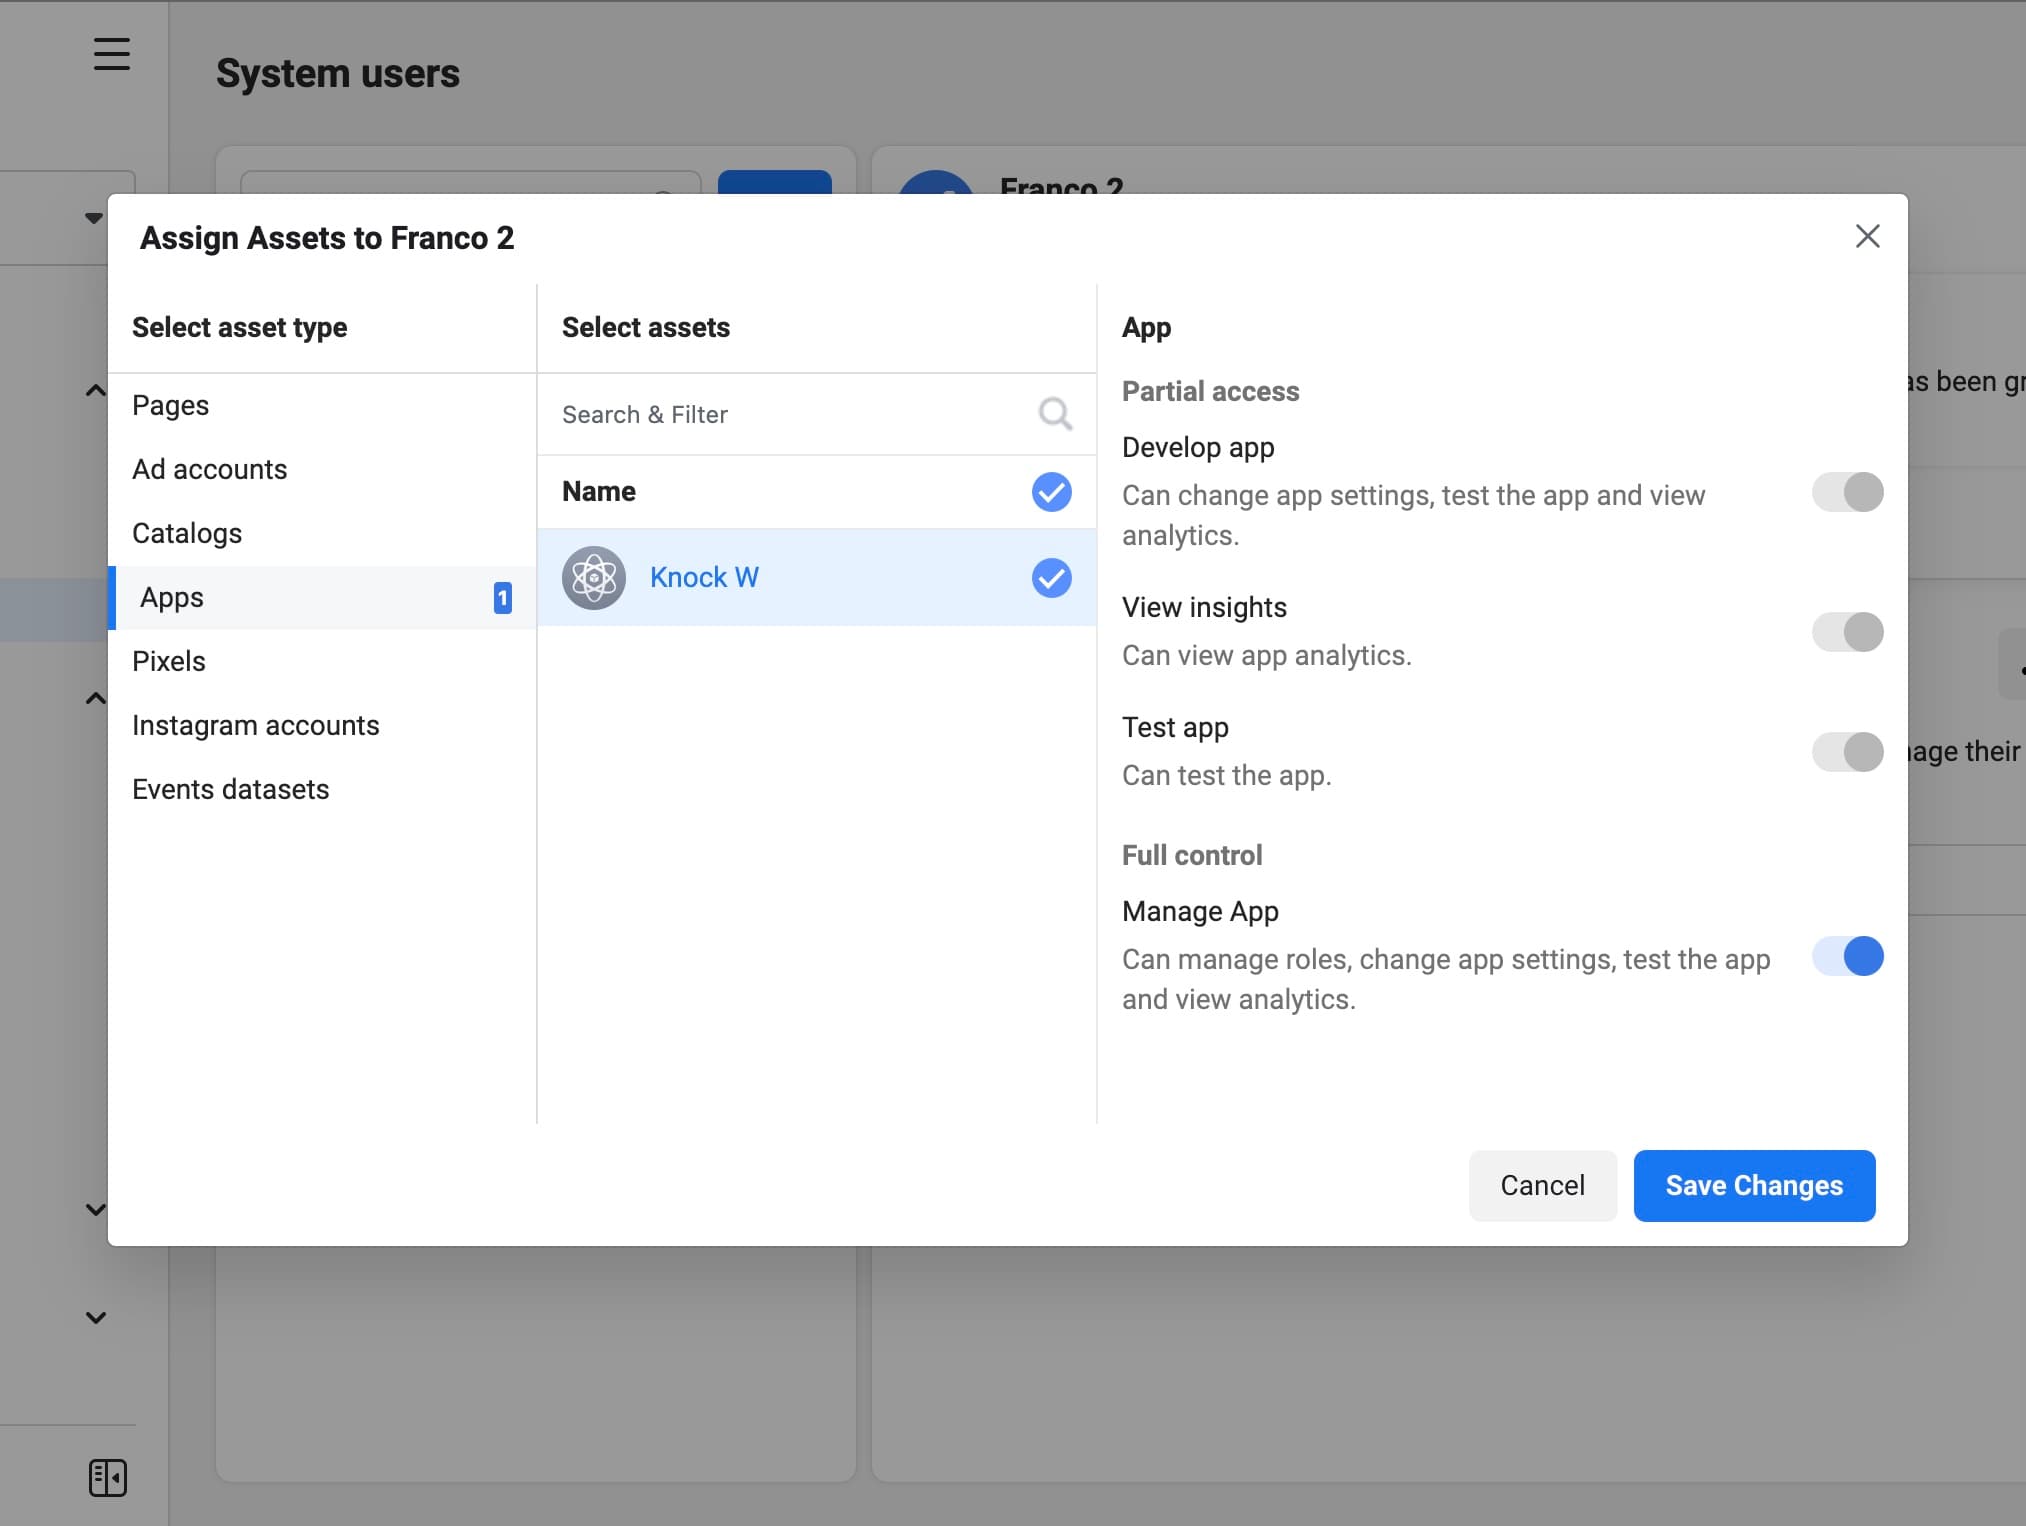
- Create an admin user. To do this you need to go to the business settings page. You will see the system users under the section of Users on the left sidebar. After you have created your new user click on Add Assets and choose App>Select App Name>Full control option and save changes.
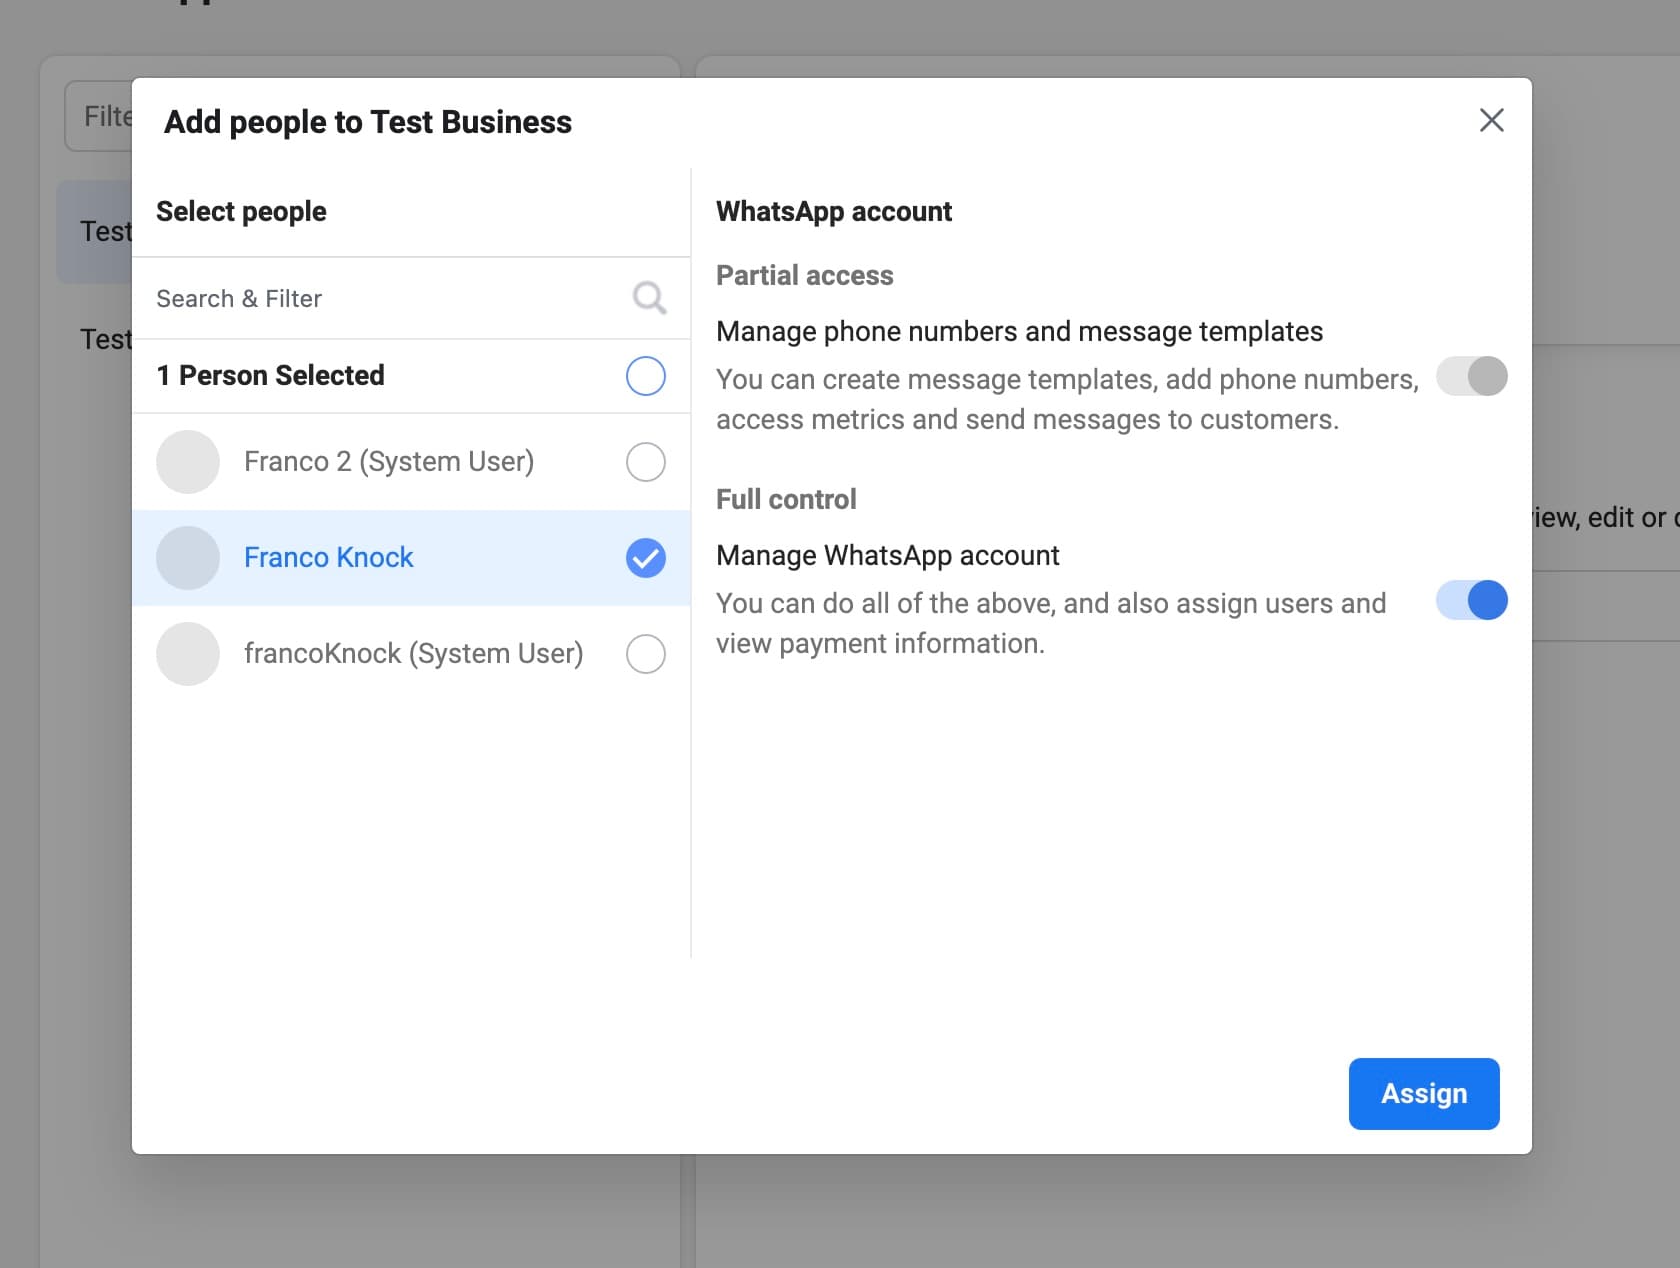
- Click on WhatsApp Accounts on the left sidebar and then select the WhatsApp business app and click the Add people button. Then choose the recently created system user and check the full control option and click the "Assign" button.
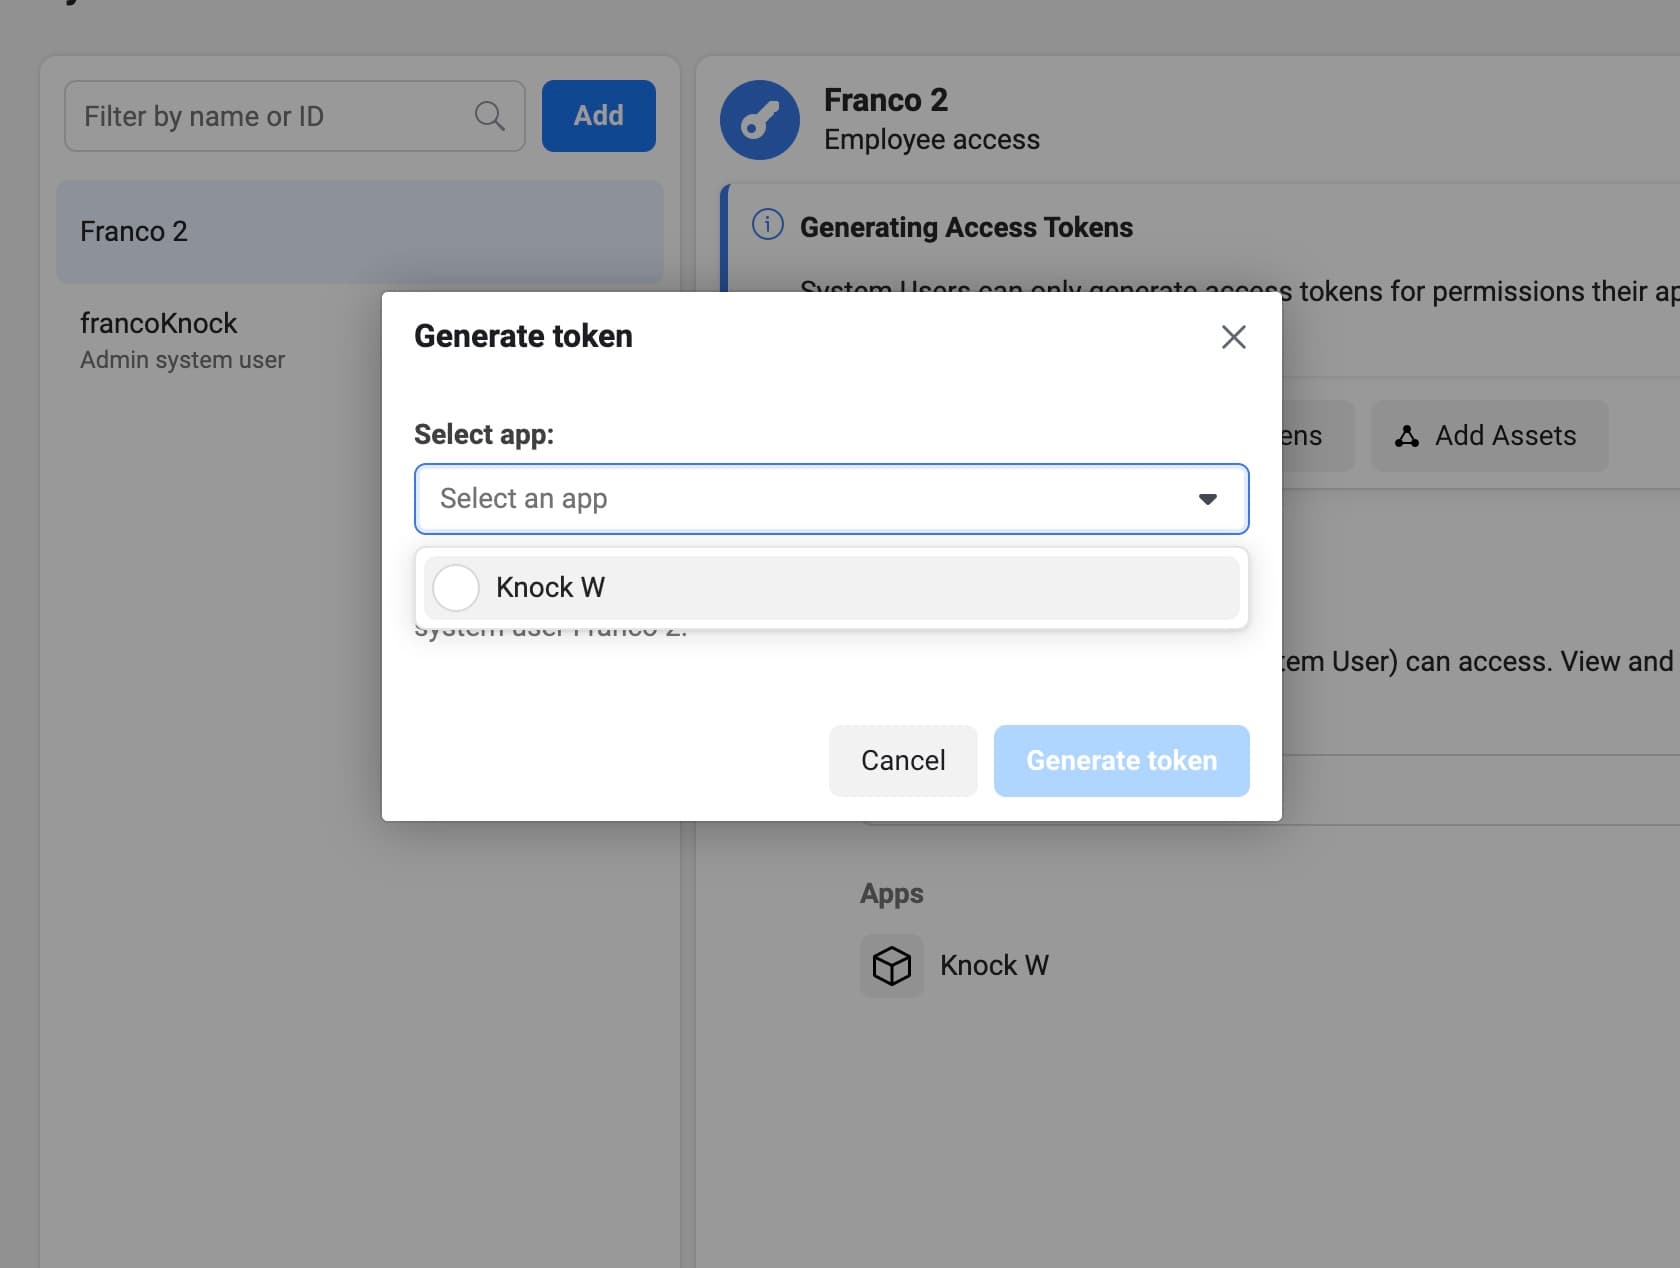
- Go back to the system users page and select the recently created system user from the list. Then click the Generate new token button.
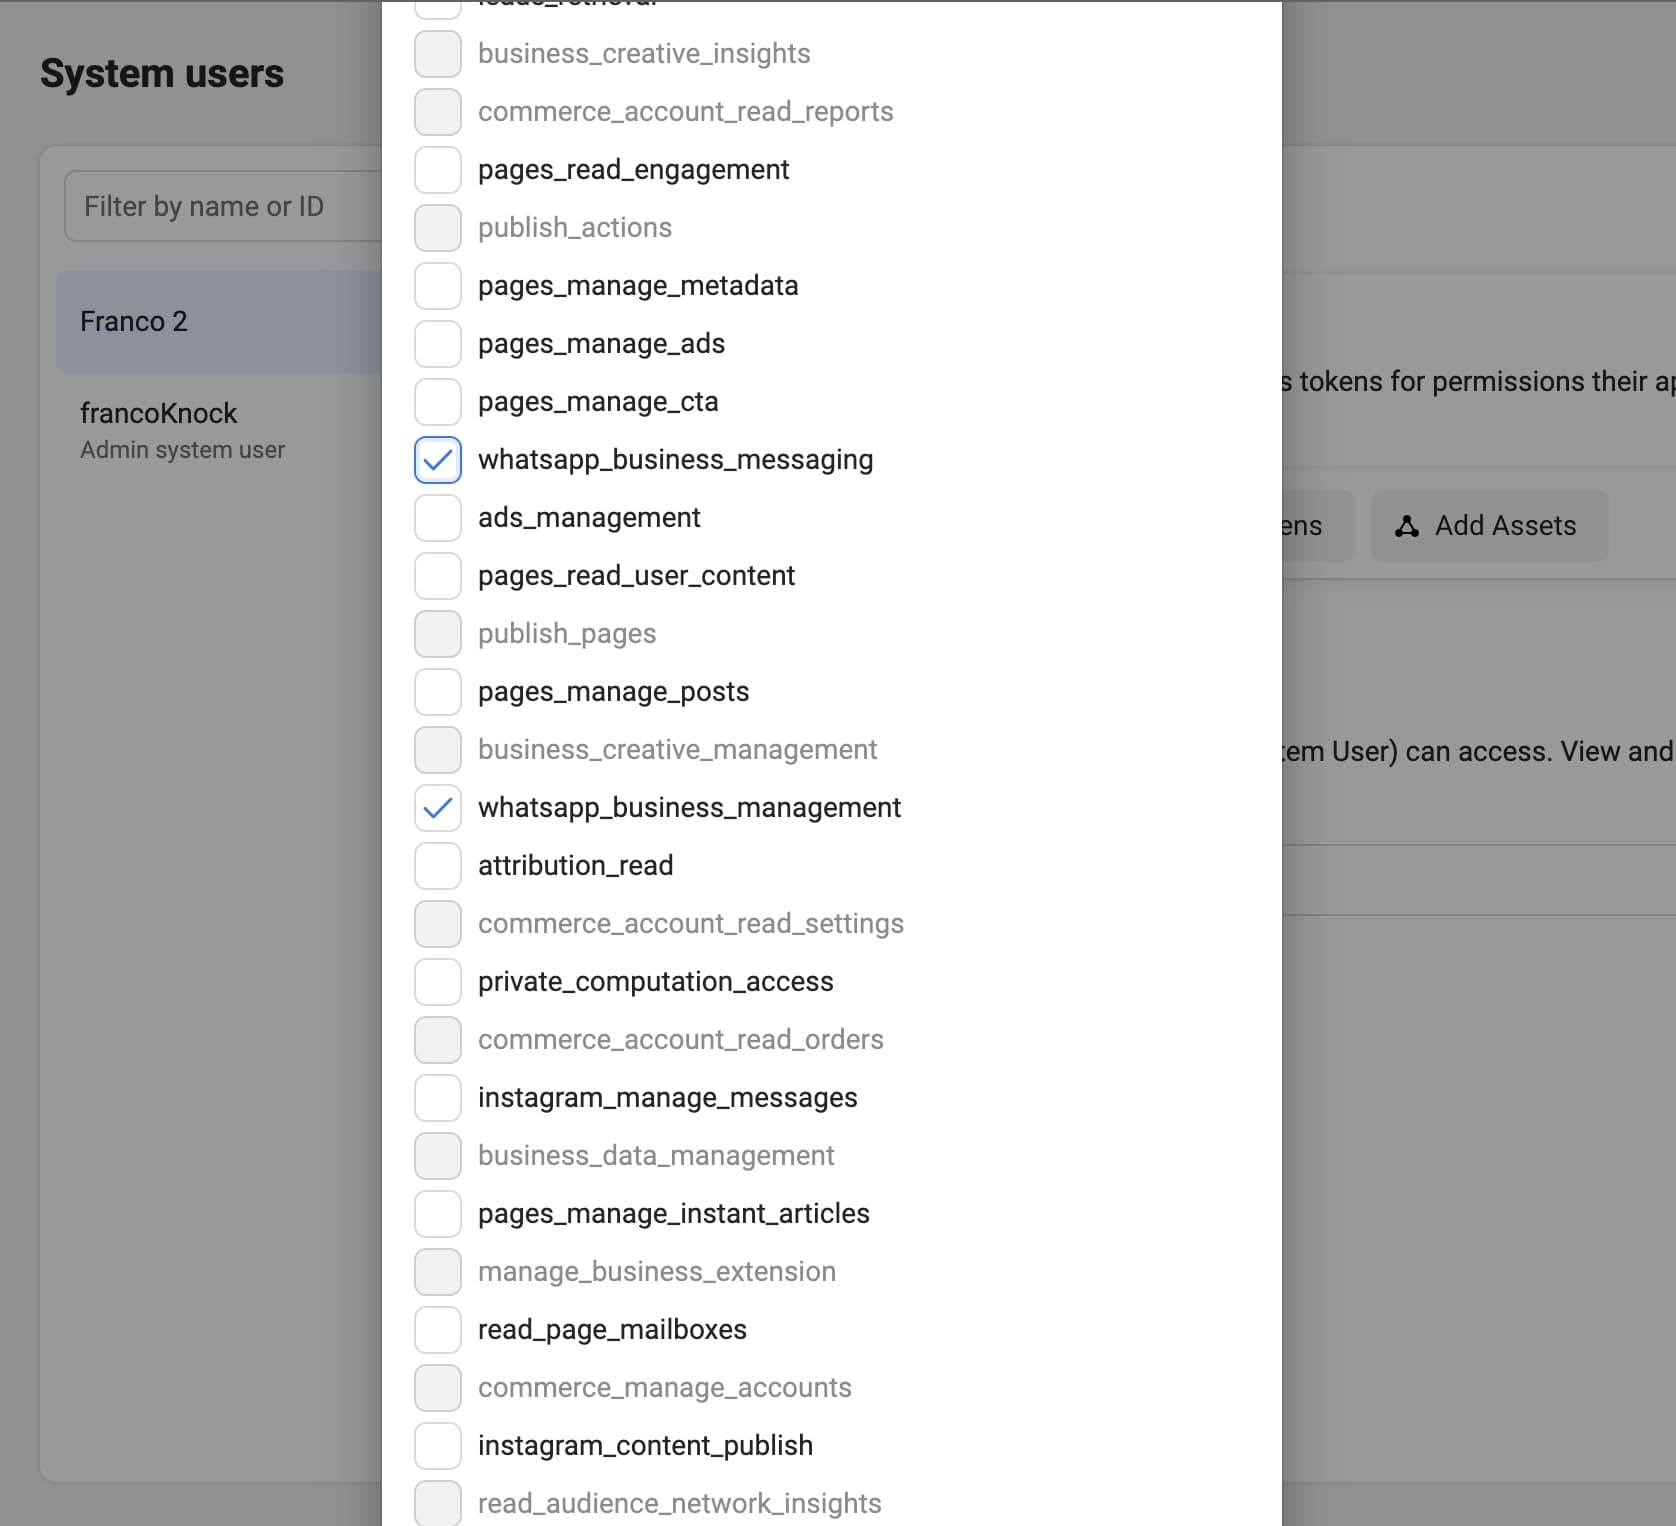
Choose your app from the dropdown and make sure the
whatsapp_business_managementandwhatsapp_business_messagingoptions are checked.
6. Add a message template
#The only way of starting a business conversation with a client is using message templates. In order to use this you must go to your message templates dashboard and click "Create template"
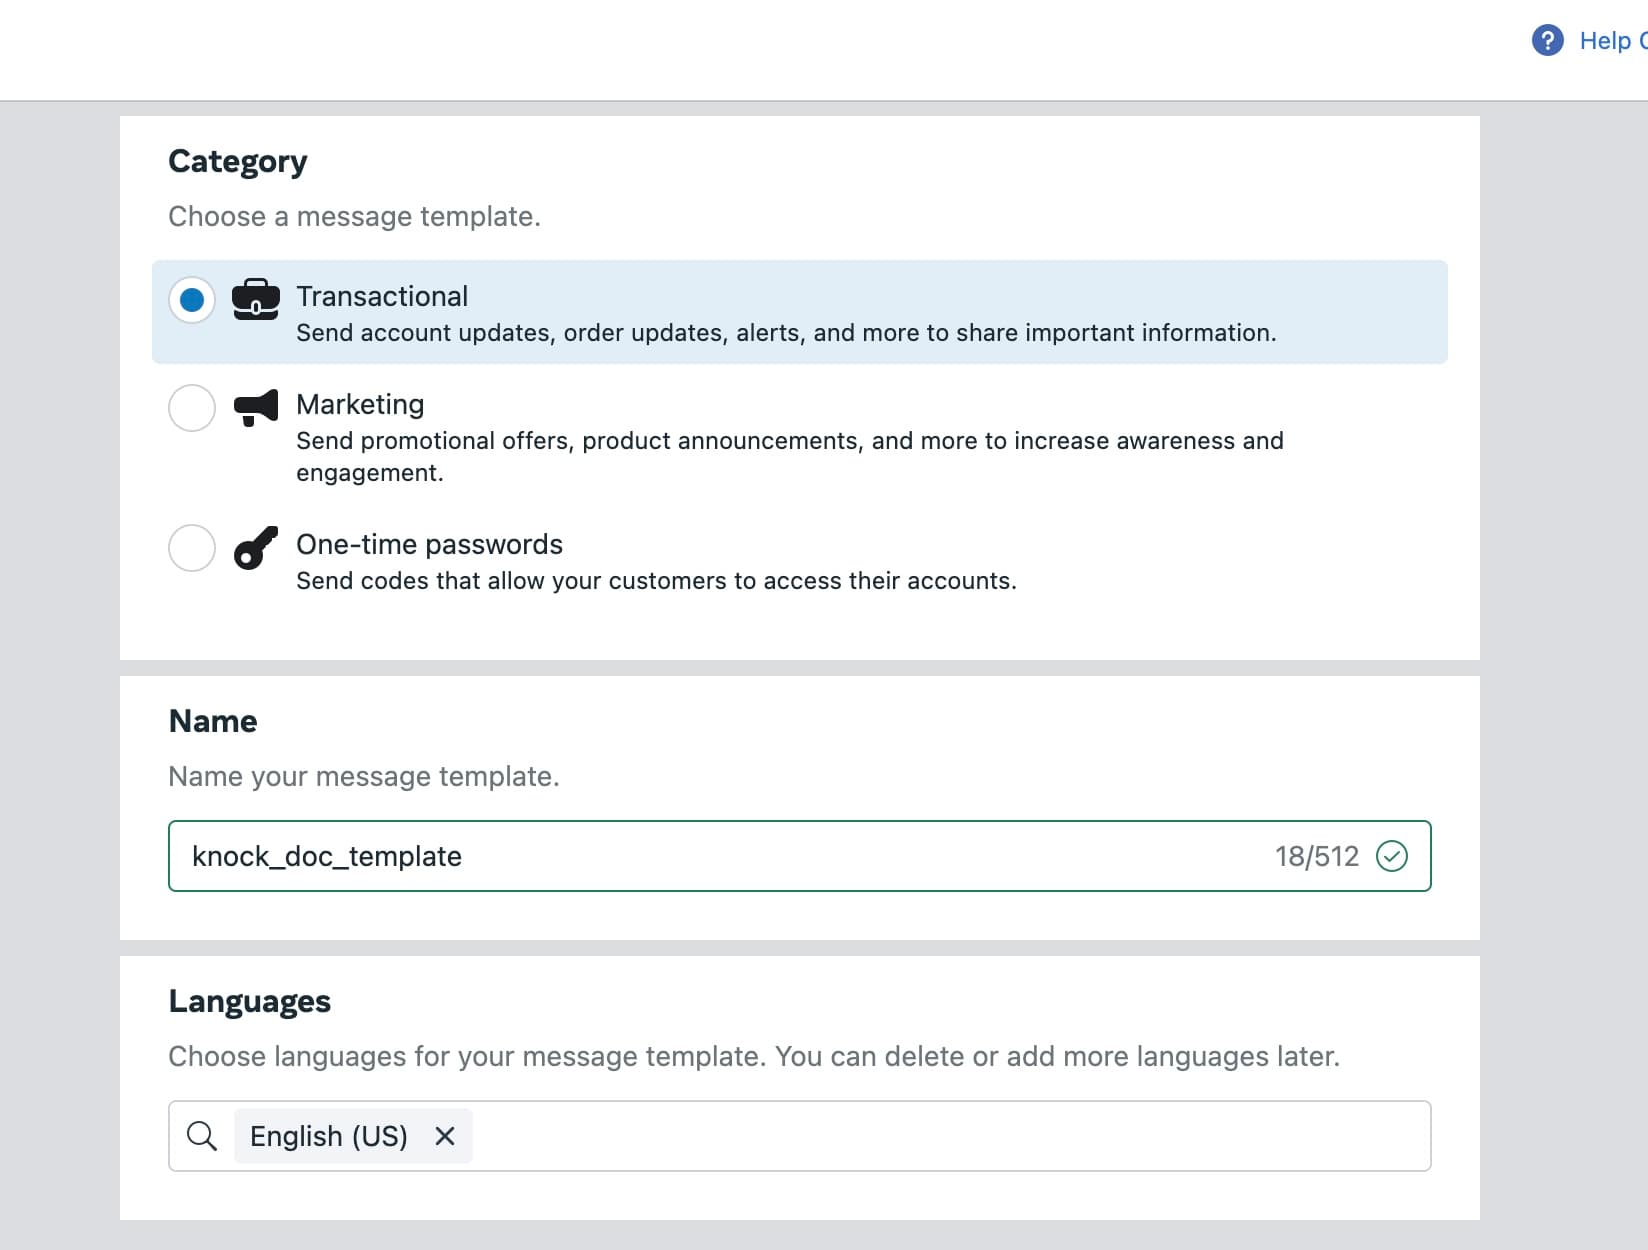
Then you must choose a category, name and language for your template and click "Continue."
After creating your template you will gain access to your editor, where you must add a Body for your message (you can also add a Header, Footer or a Button if you want)
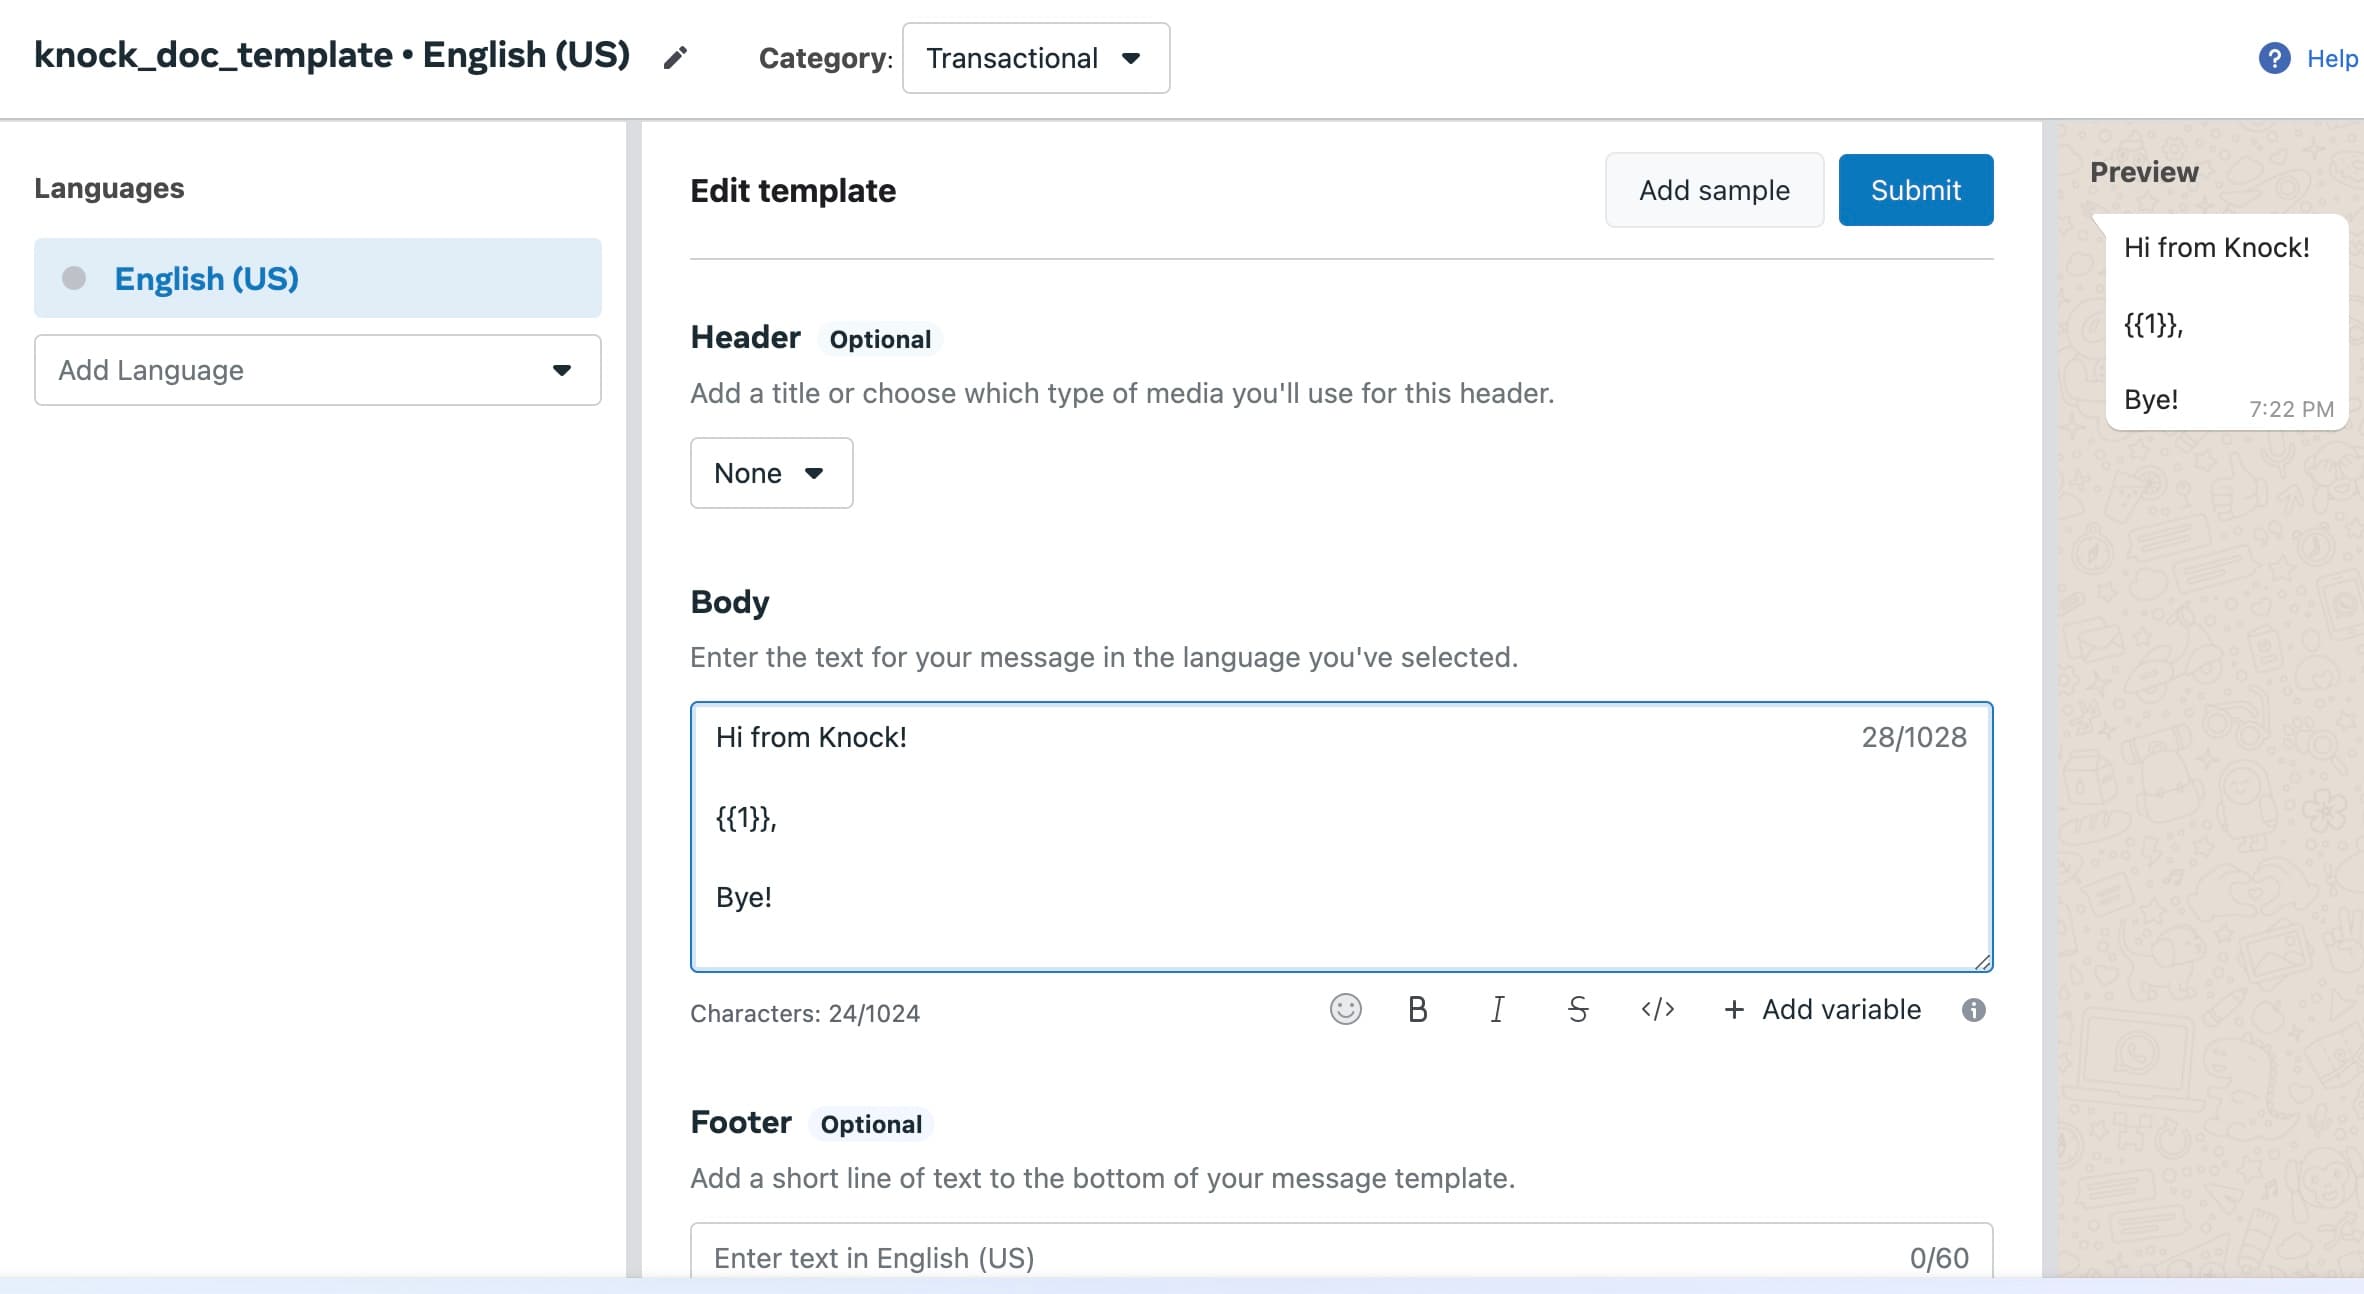
Once you have finished you must click on "Submit," then you have to wait for WhatsApp to approve your template in order to start using it.
Configuring WhatsApp in Knock
#Now that you have a business phone number id, an access token and a template message you're ready to configure your WhatsApp channel within Knock.
1. Create a WhatsApp channel
#You can create a new WhatsApp channel in the dashboard by navigating to Channels and sources in your account settings. From there, you'll need to configure the channel for each environment you have using your access token and phone number id.
2. Send a template object
#In order to use a WhatsApp template message, you must send a template object. For this you must specify this object in your message body using your template editor and JSON (with Liquid if you want), following the next format:
Additional information
#Here are a few other things to keep in mind once you have your WhatsApp channel configured in Knock:
- Deliverability tracking. We cannot currently track deliverability through WhatsApp channels. This means that all notifications sent through WhatsApp will show up as "Sent" in the Knock messages log, but not "Delivered."
Provider configuration
#The authentication token from your WhatsApp app.
The phone number ID associated with your business phone number.
Recipient data requirements
#In order to send a notification you'll need a valid phone_number property set on your recipient in E.164 format.